
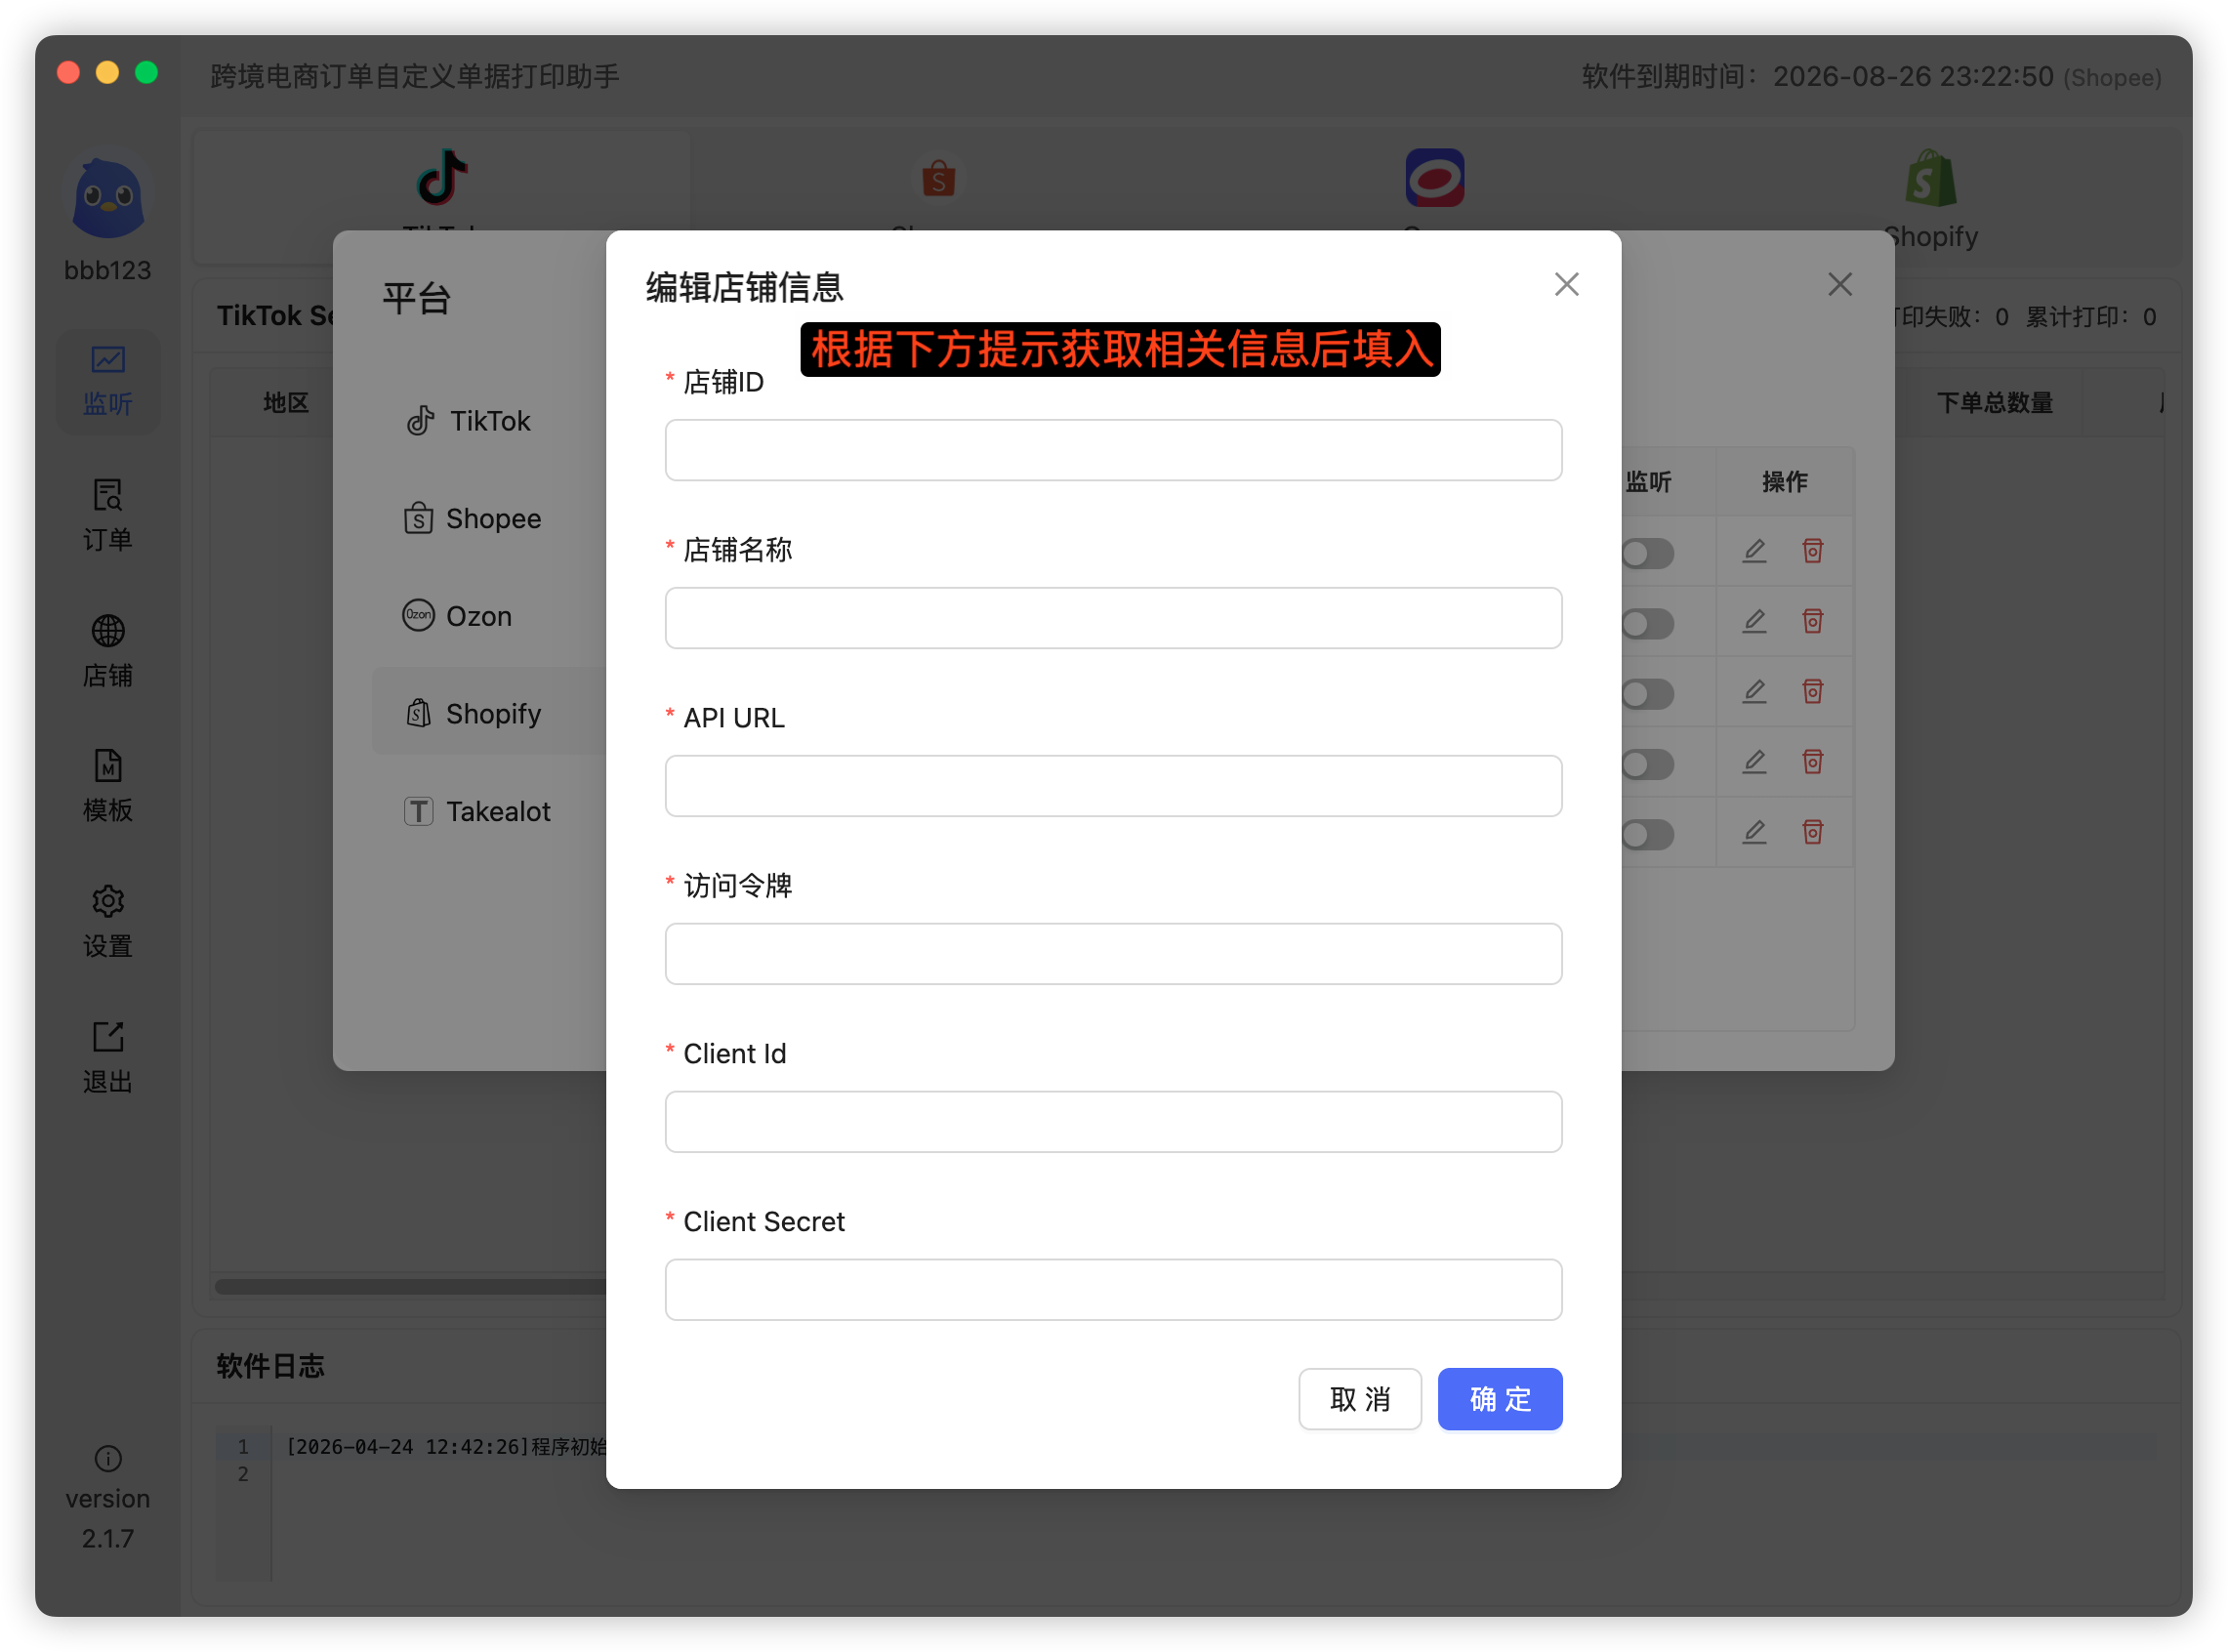
Connecting a Shopify store requires 5 fields in the app: Store ID, Store Name, API URL, Client Id, Client Secret. The store name is up to you; the other four come from your Shopify admin. This guide walks you through the whole flow.
1. Add the store in CH Order Print
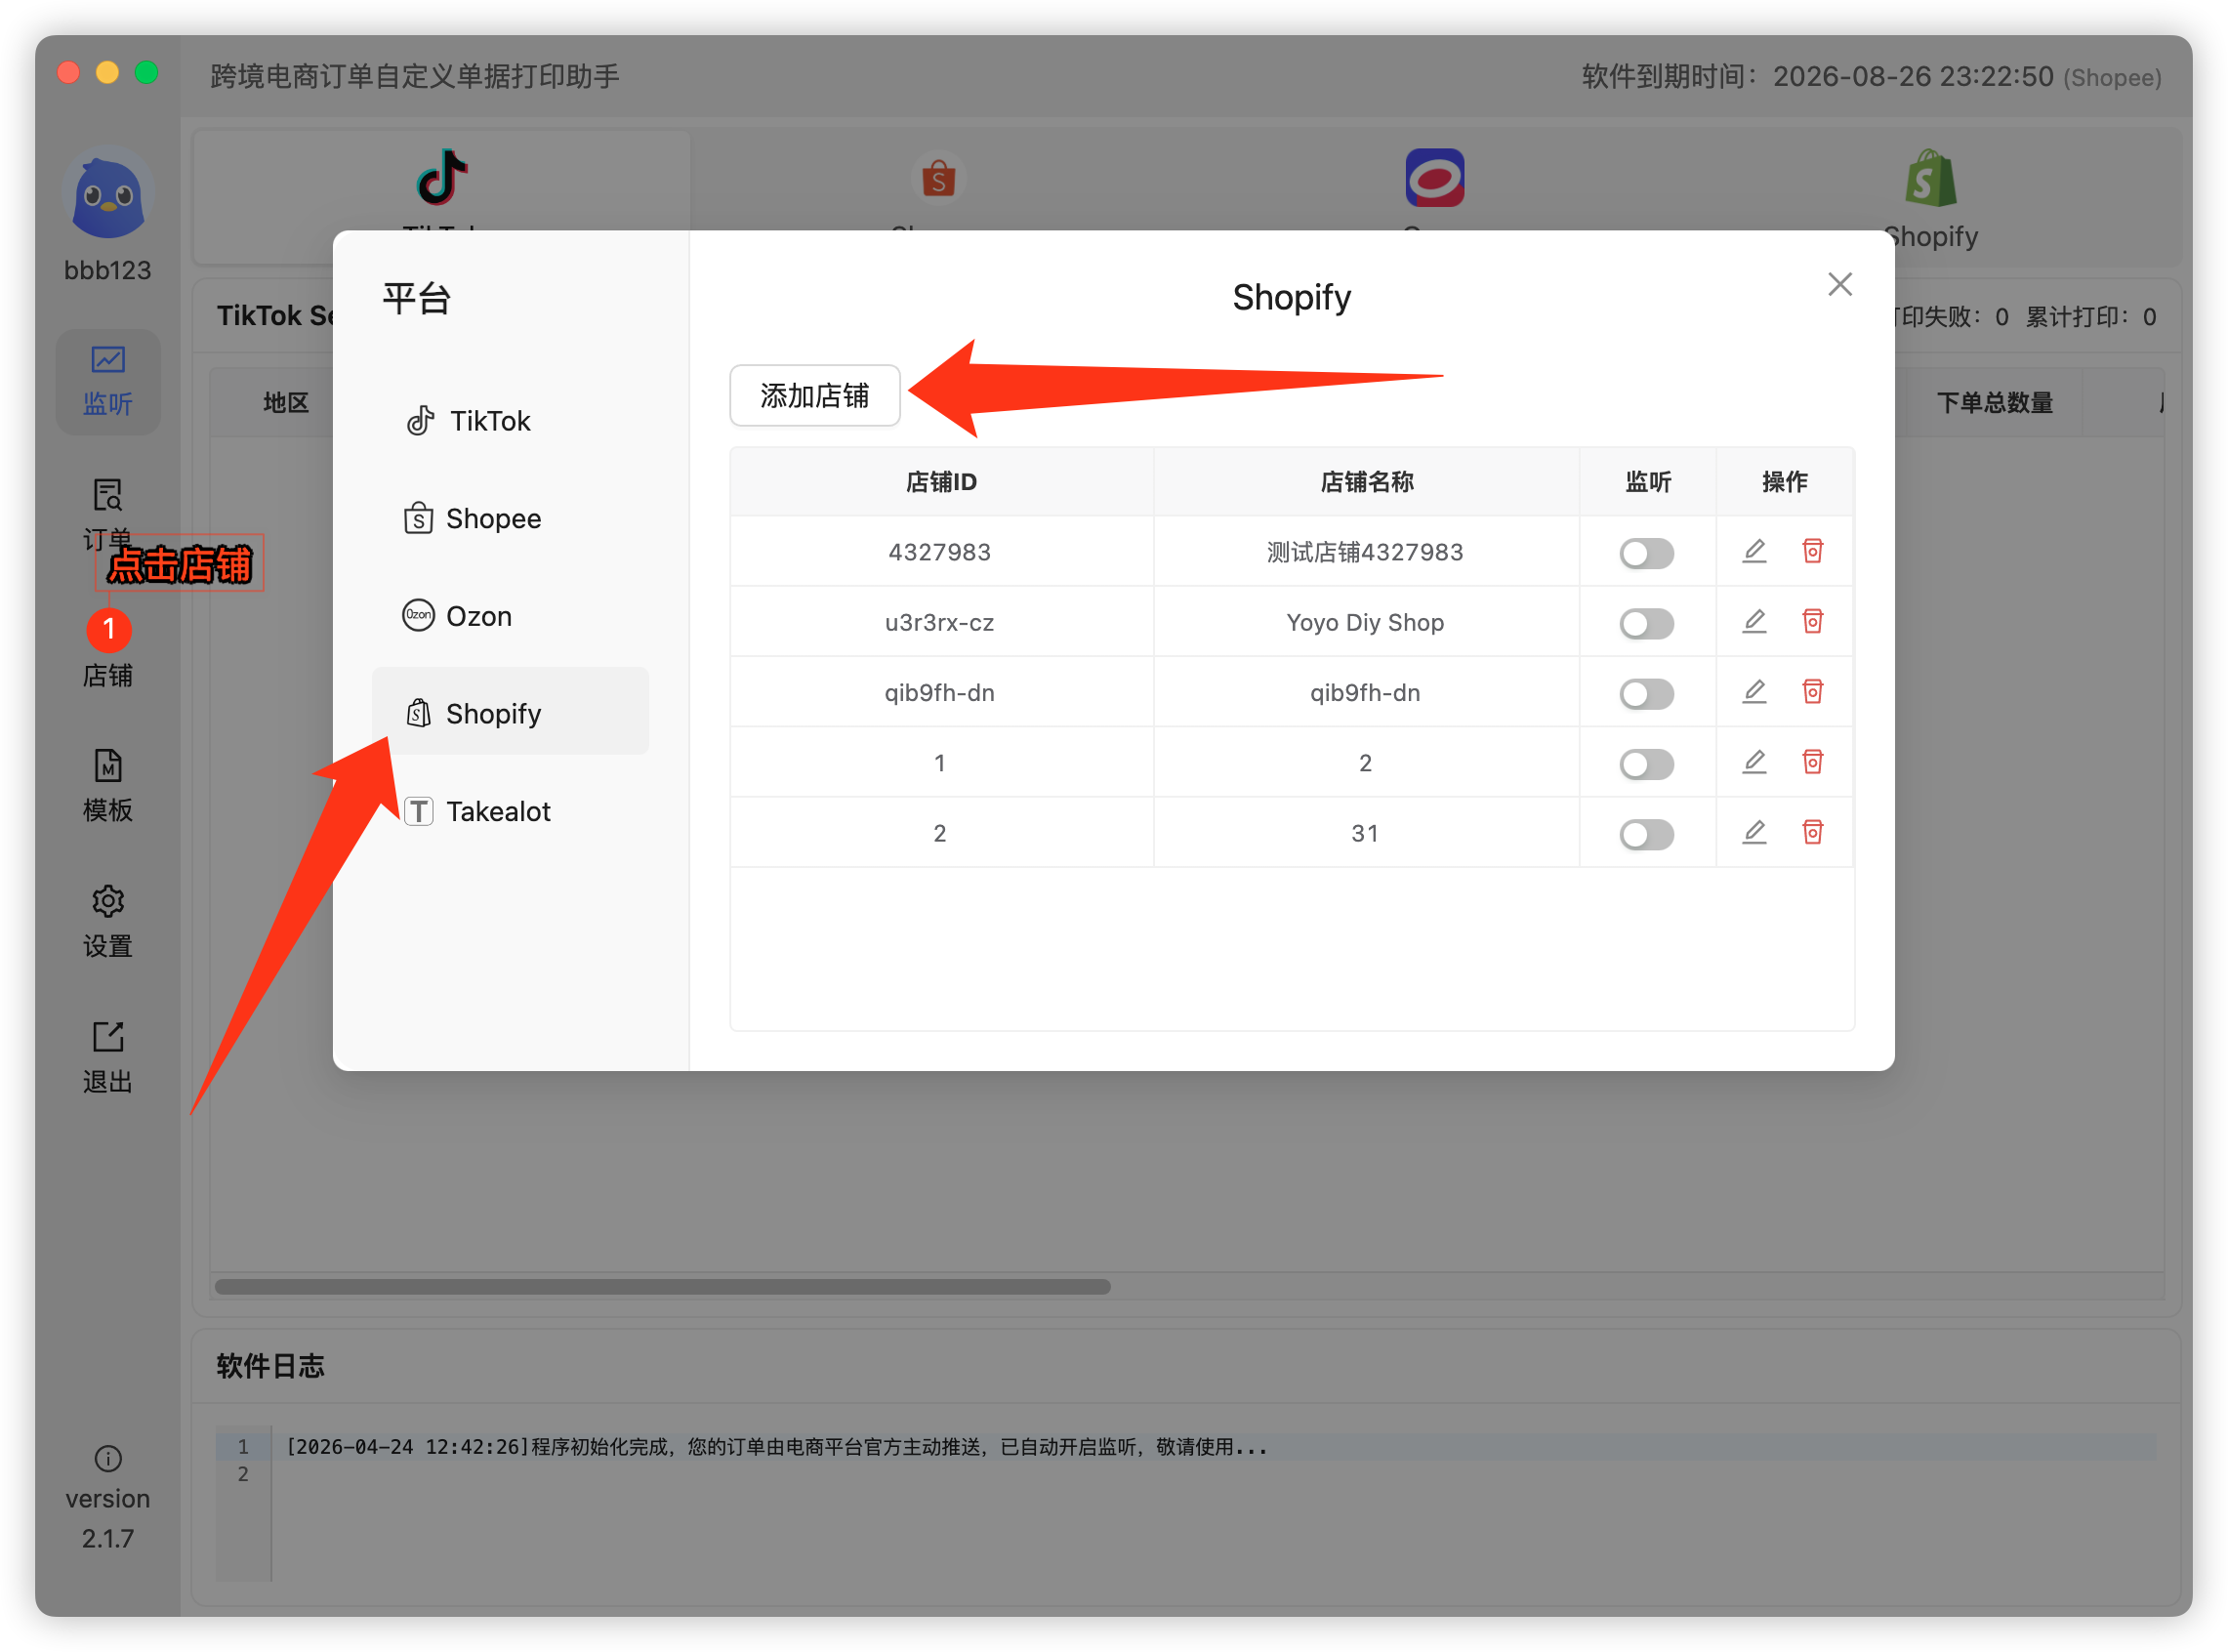
- Click Stores on the right to open Store Management;
- Select Shopify as the platform and click Add Store.
2. Get the Store ID and API URL
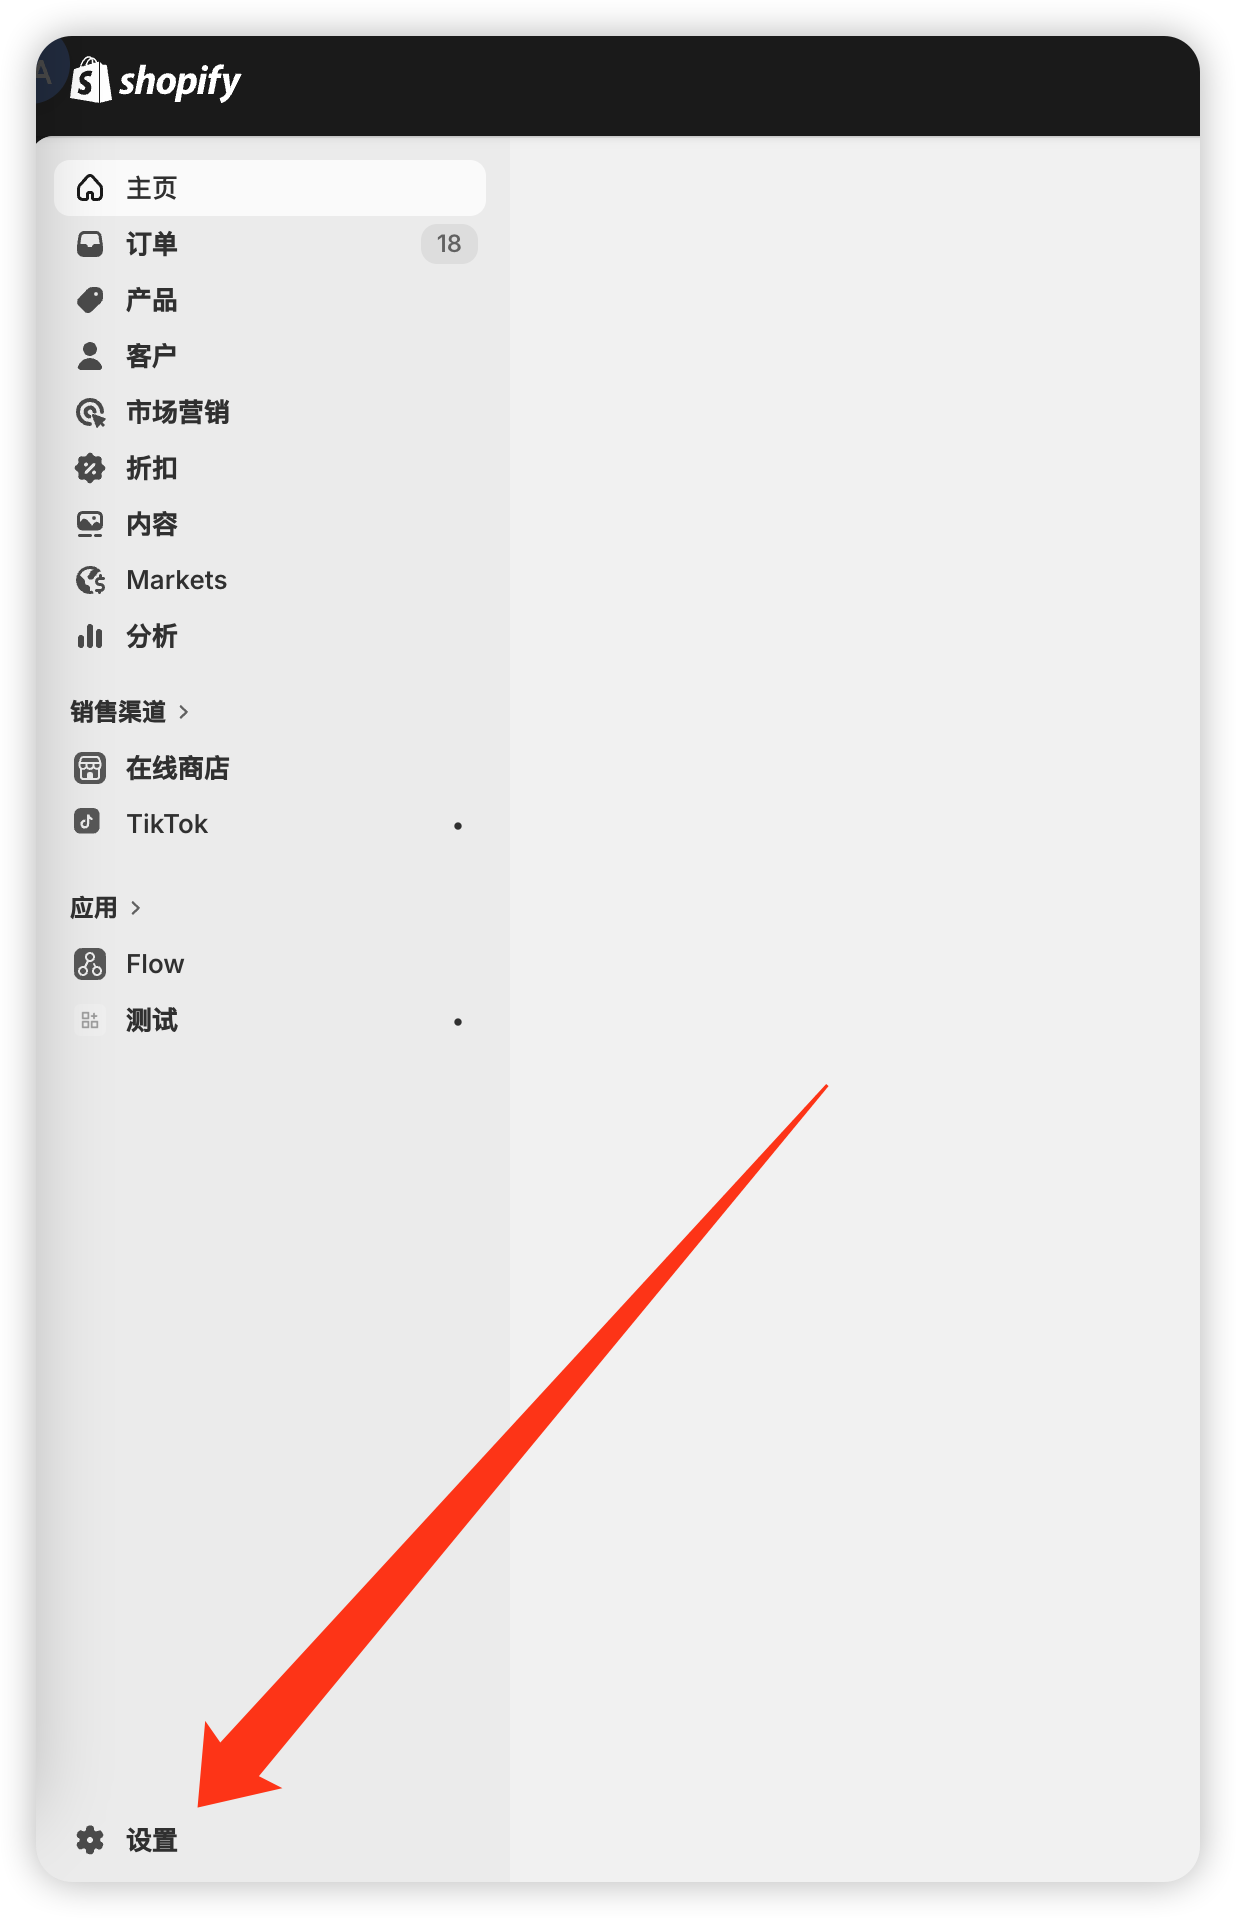
- Open your Shopify admin, go to Settings → Domains;
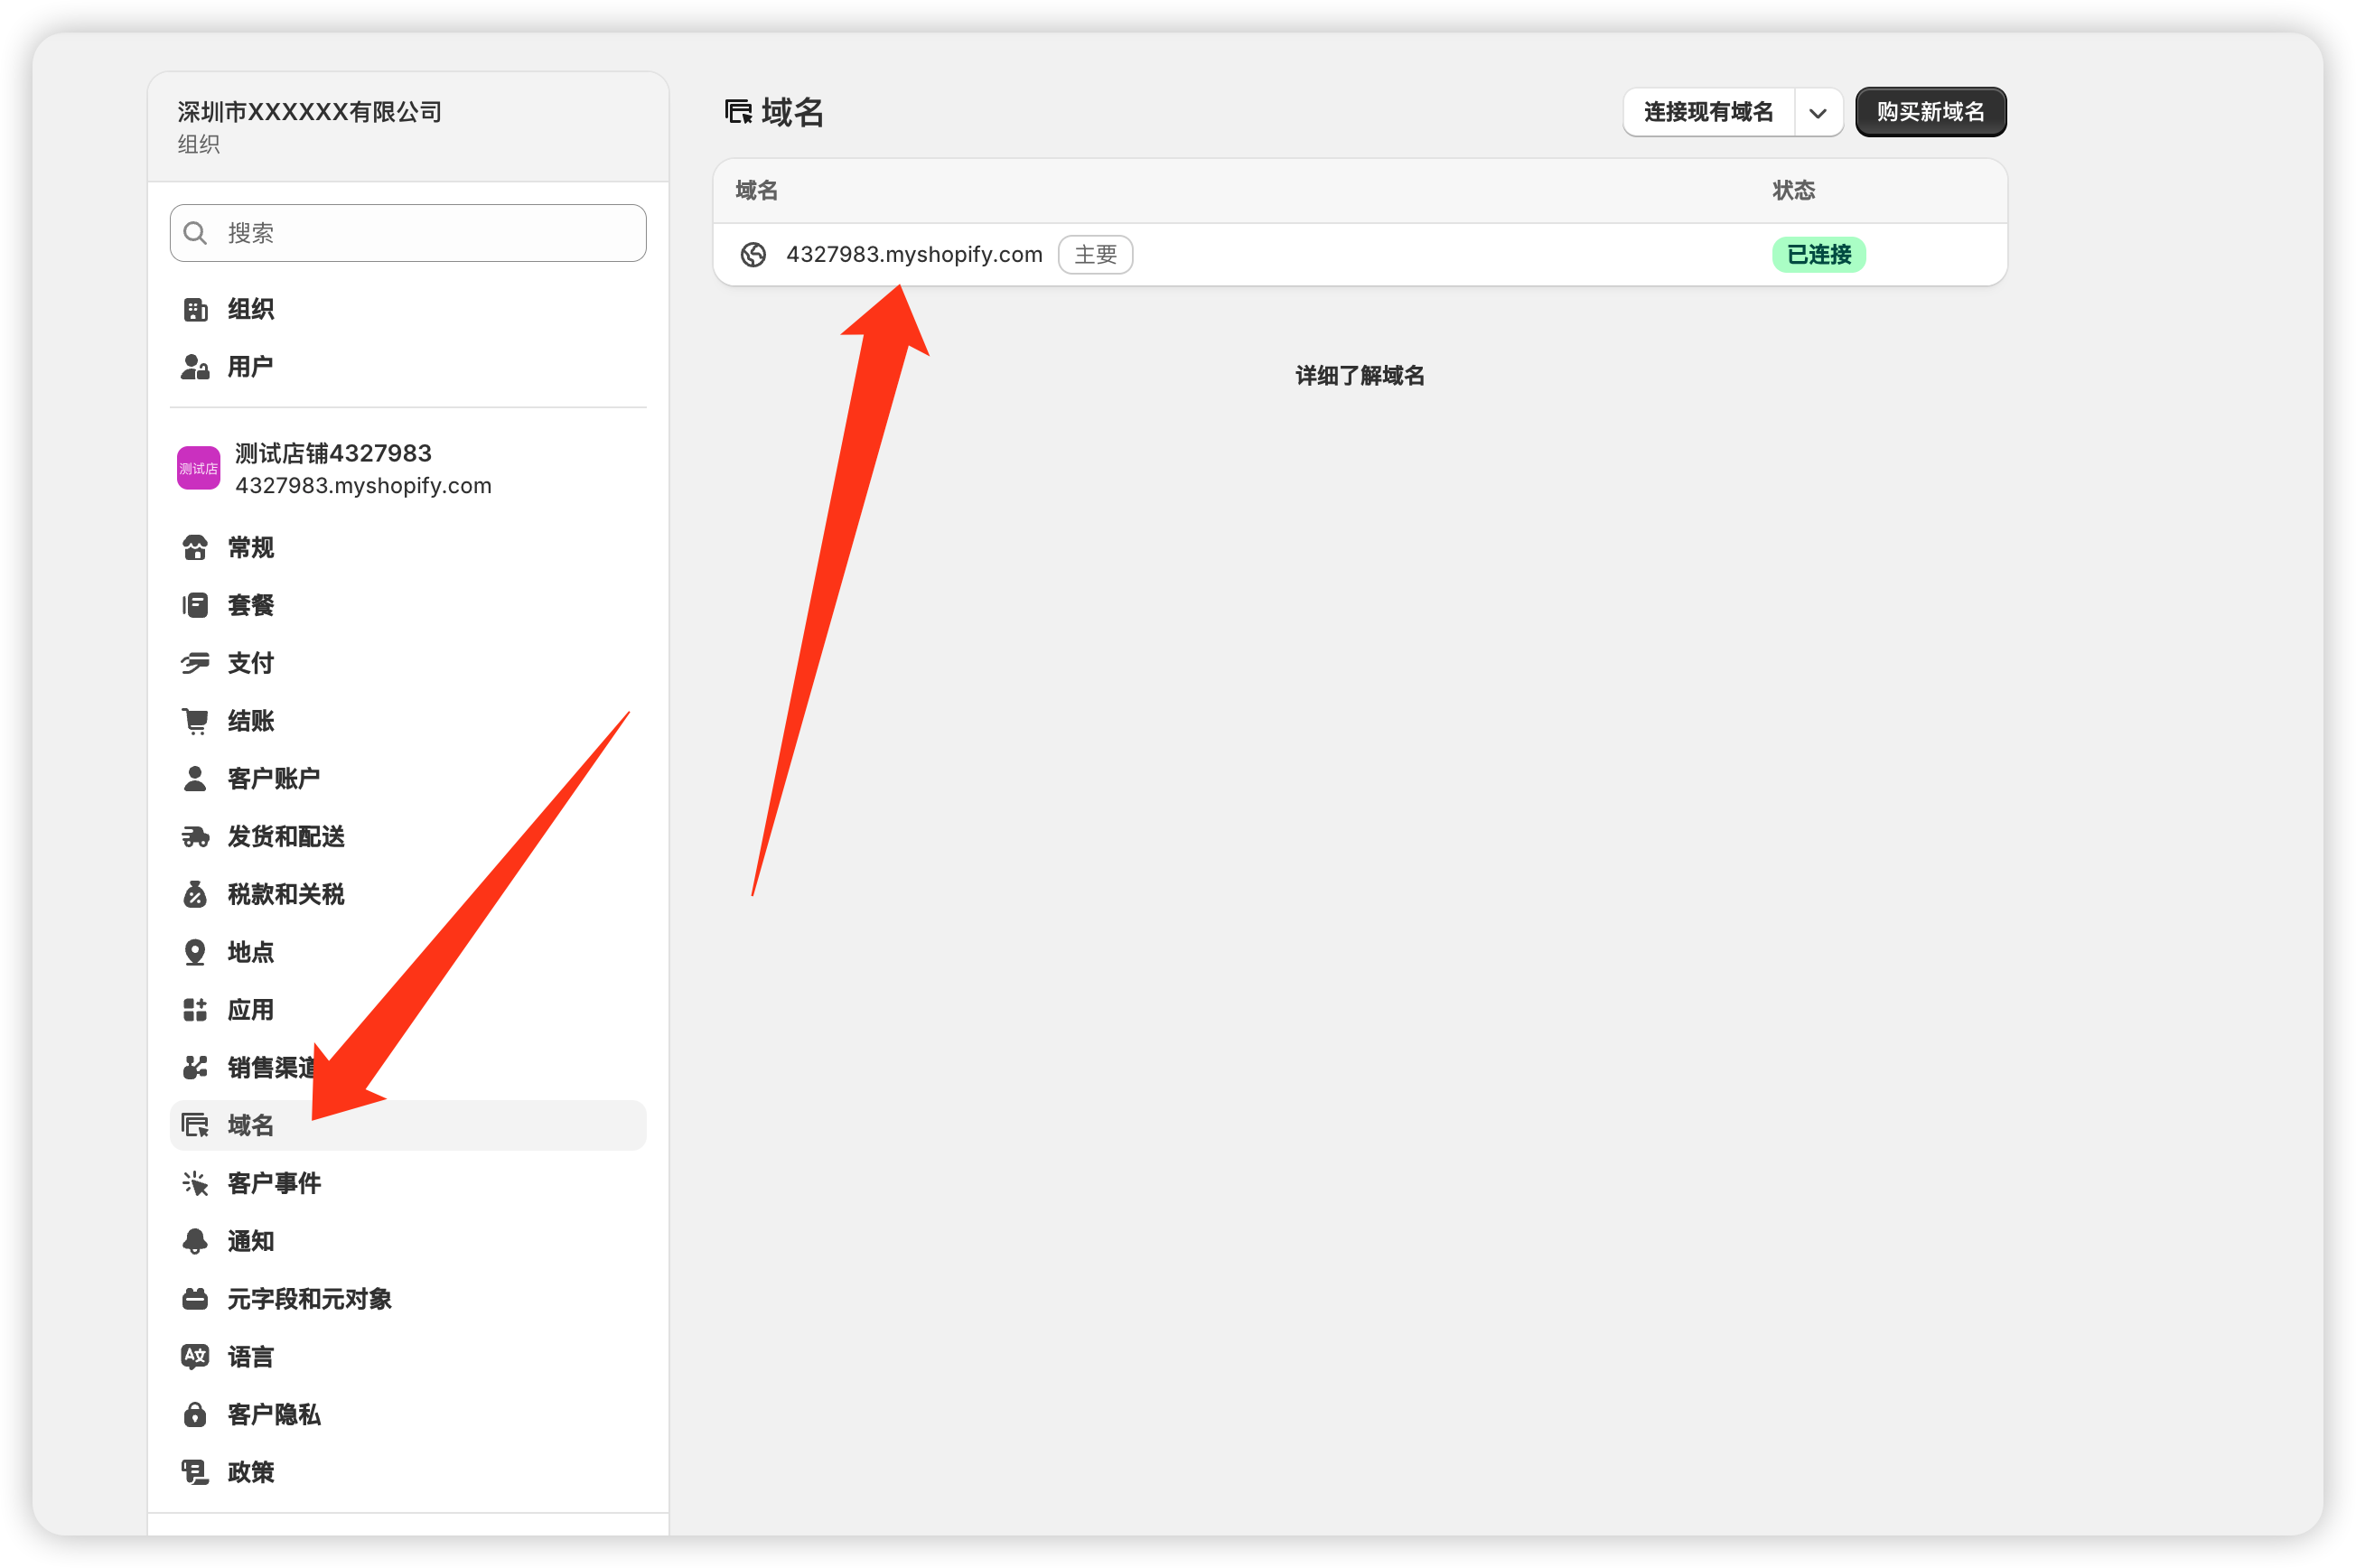
In the domain list, pick the default domain assigned by Shopify (NOT your custom domain!). Default domains look like "letters+digits prefix.myshopify.com", e.g.:
hud-1dfxiq.myshopify.comyzjji64d-f.myshopify.com
Never use your own custom domain. Say your default domain is 4327983.myshopify.com, then:
- API URL:
4327983.myshopify.com - Store ID:
4327983(the domain prefix)
3. Create a custom app for the Client Id / Client Secret
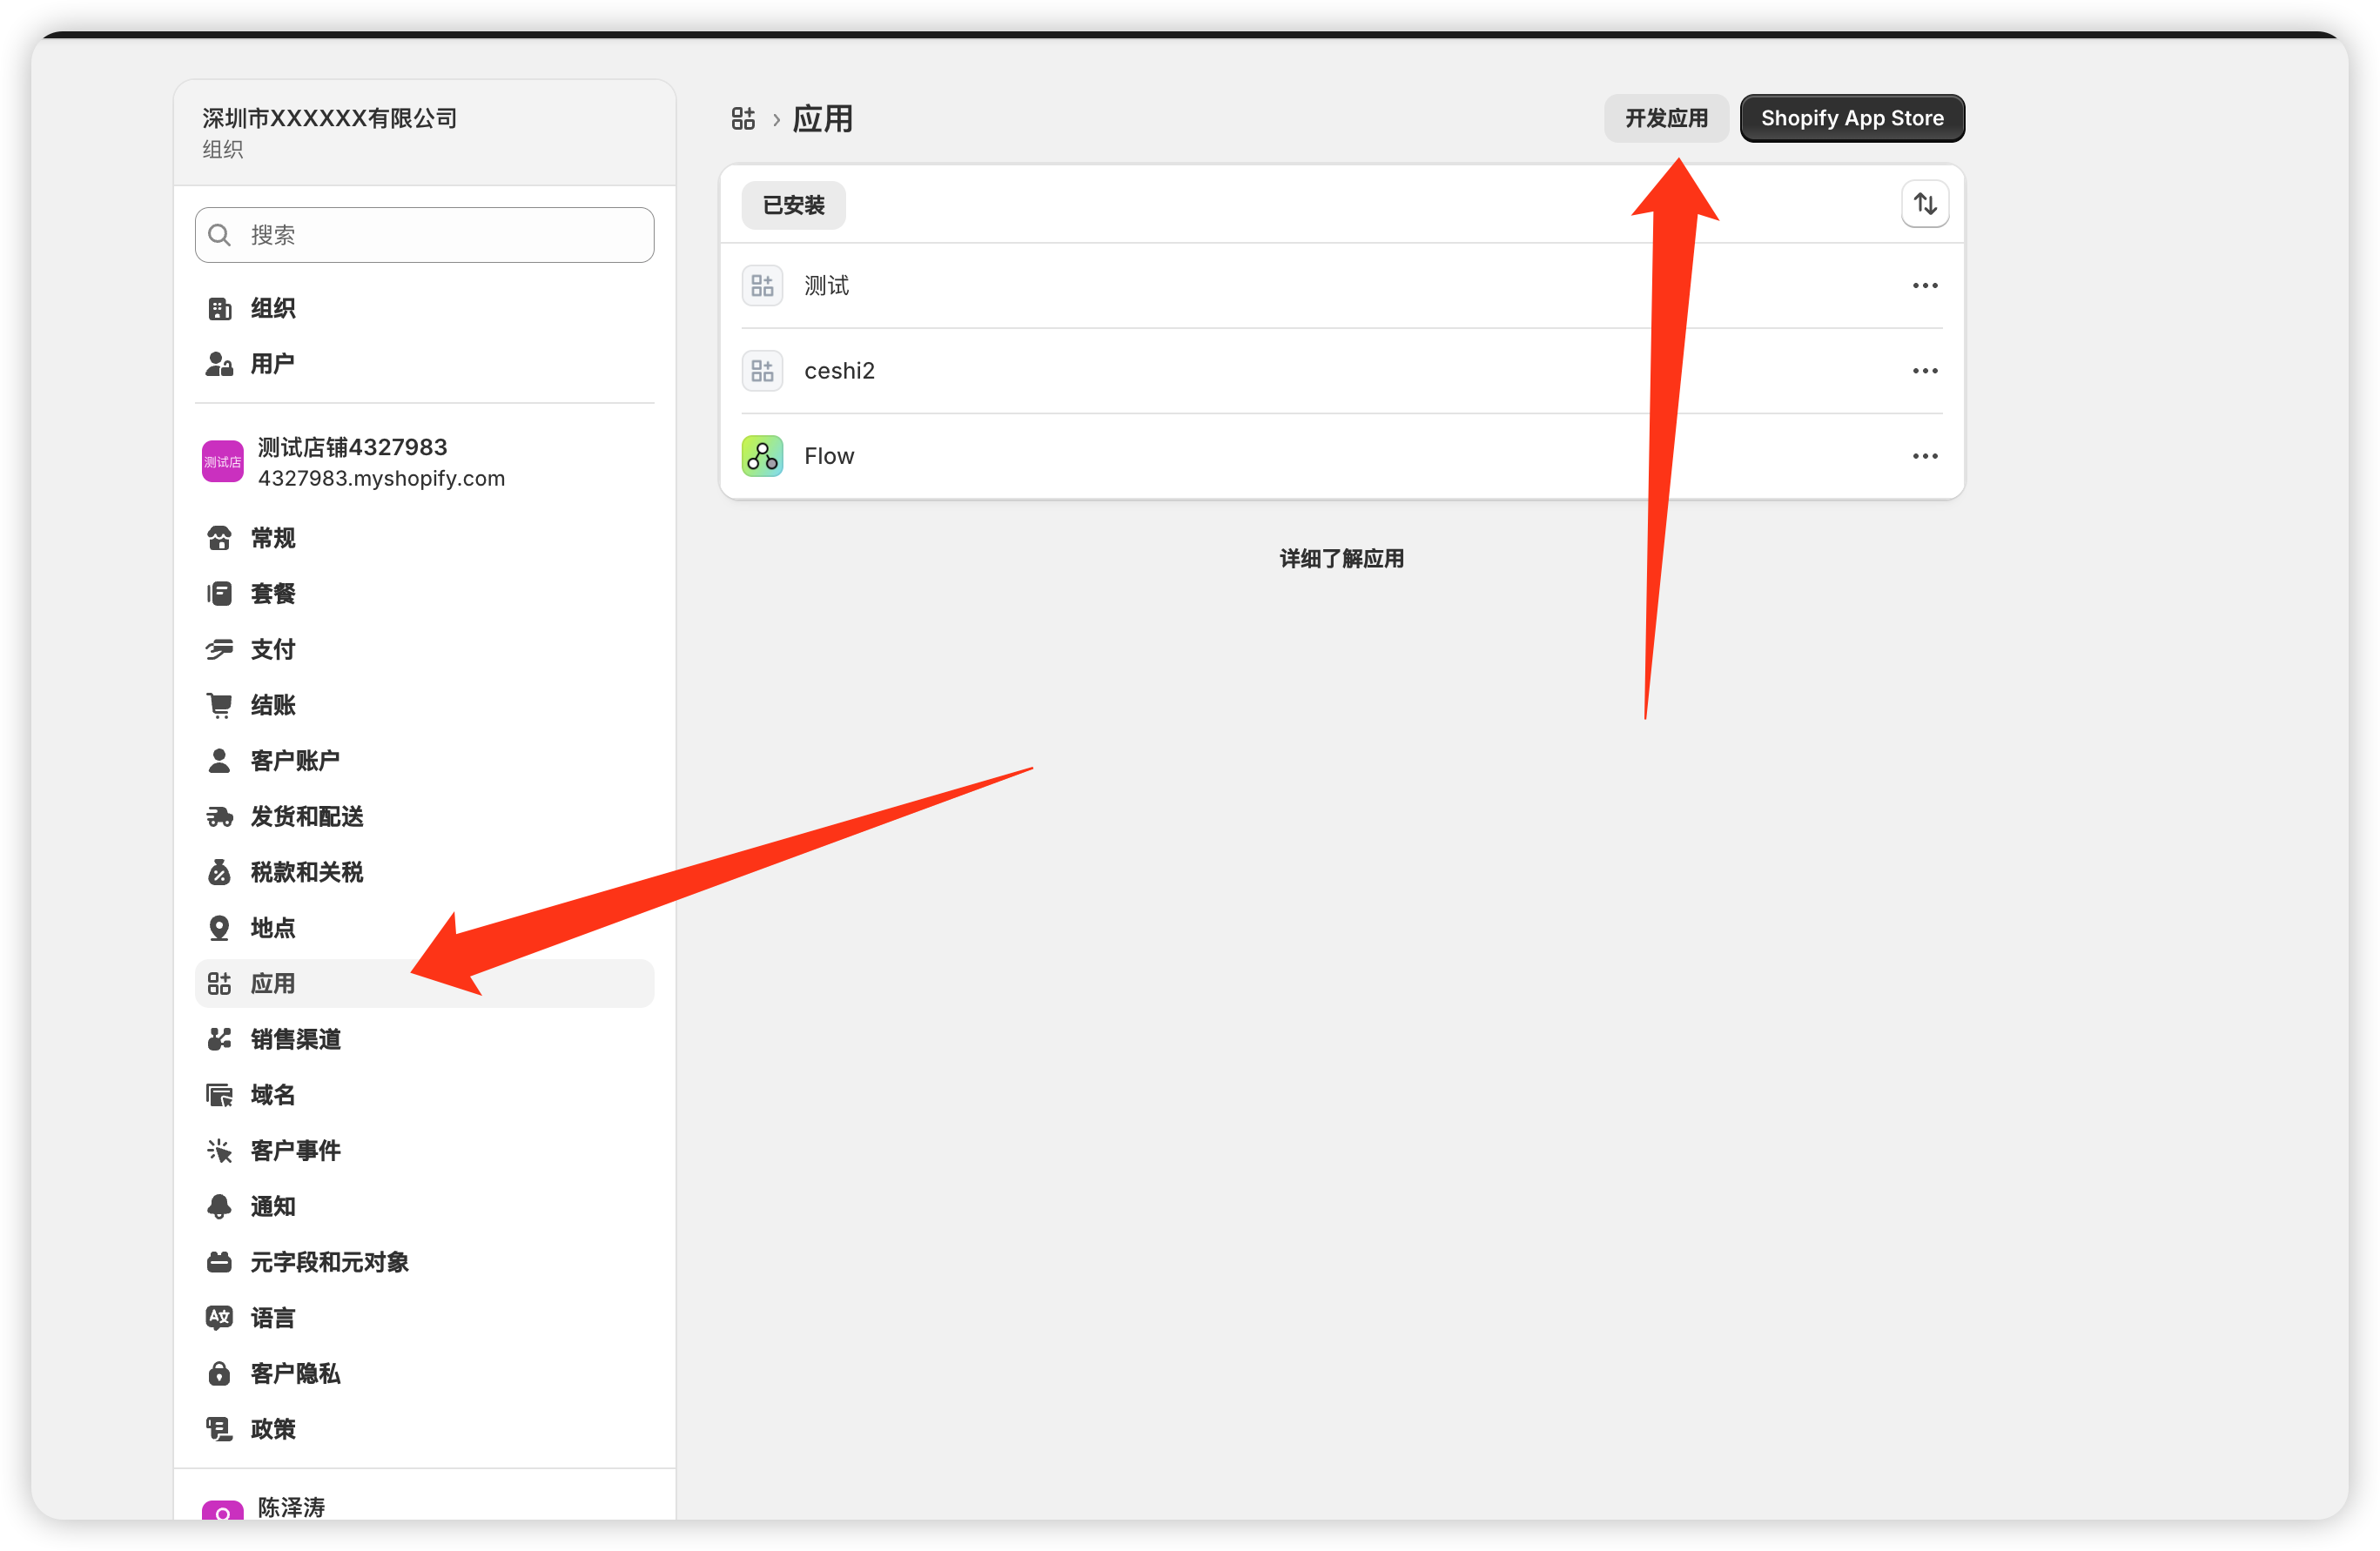
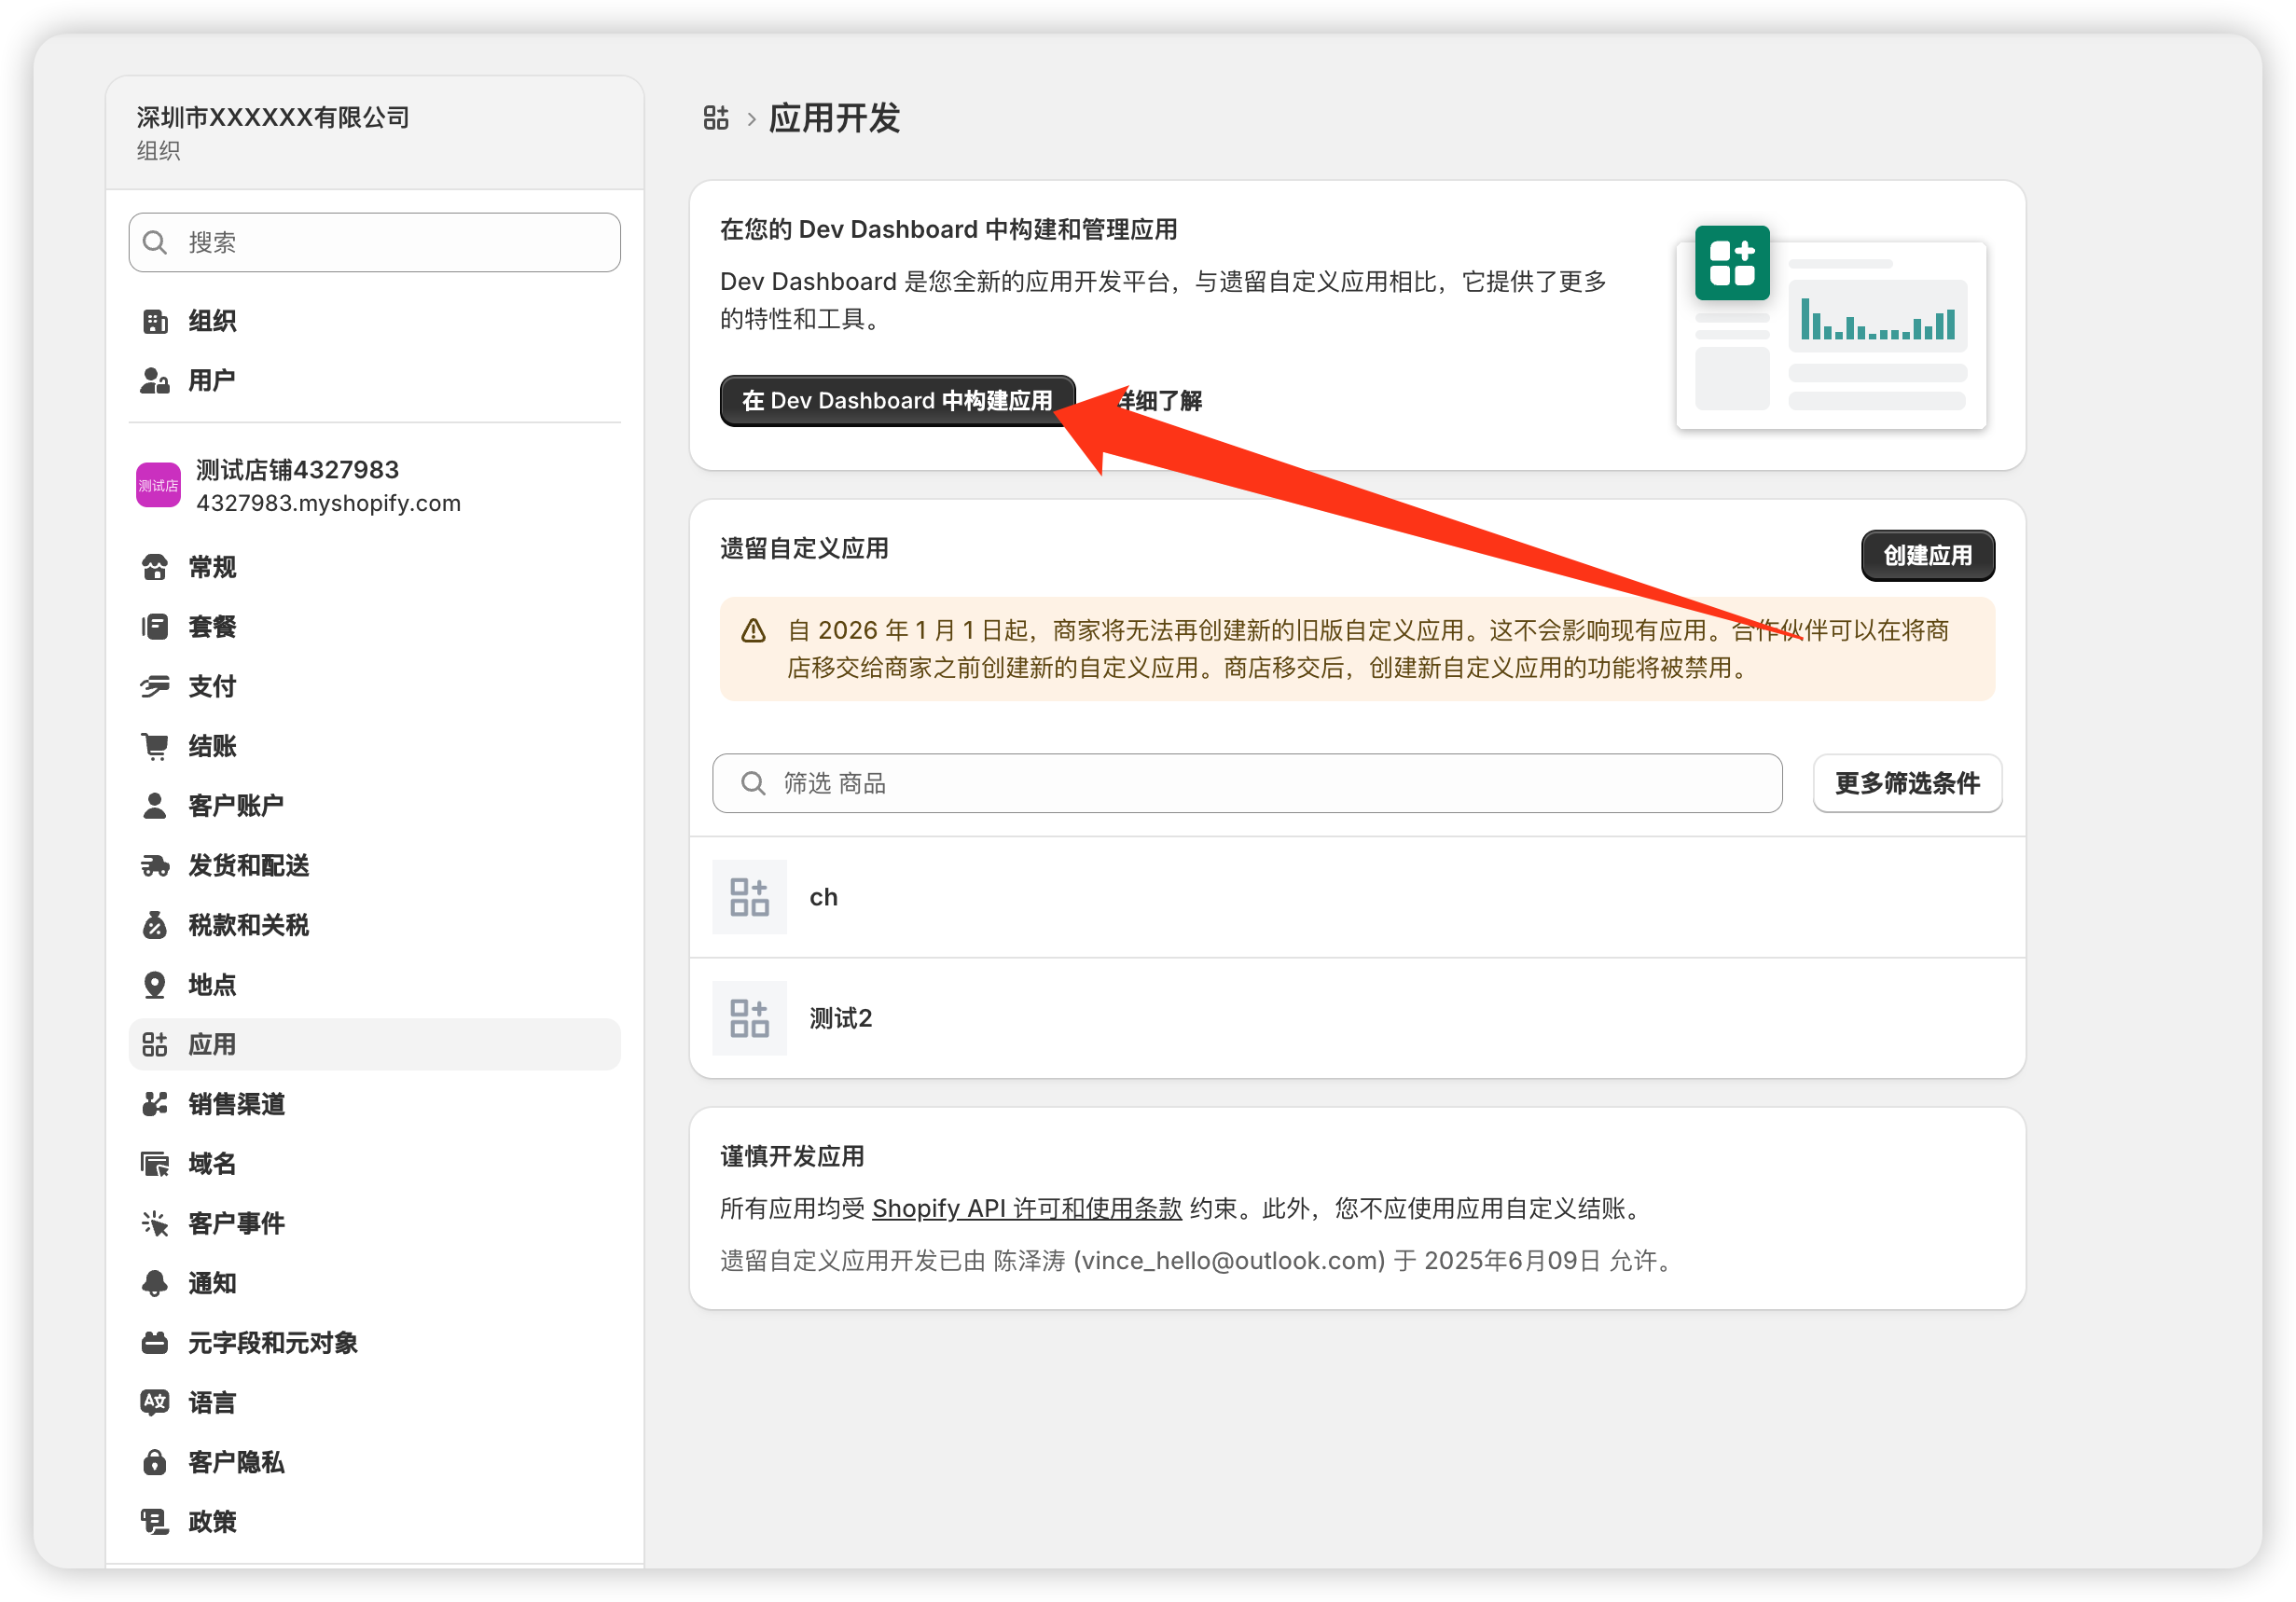
- Go to Apps → Develop apps → Build apps in Dev Dashboard;
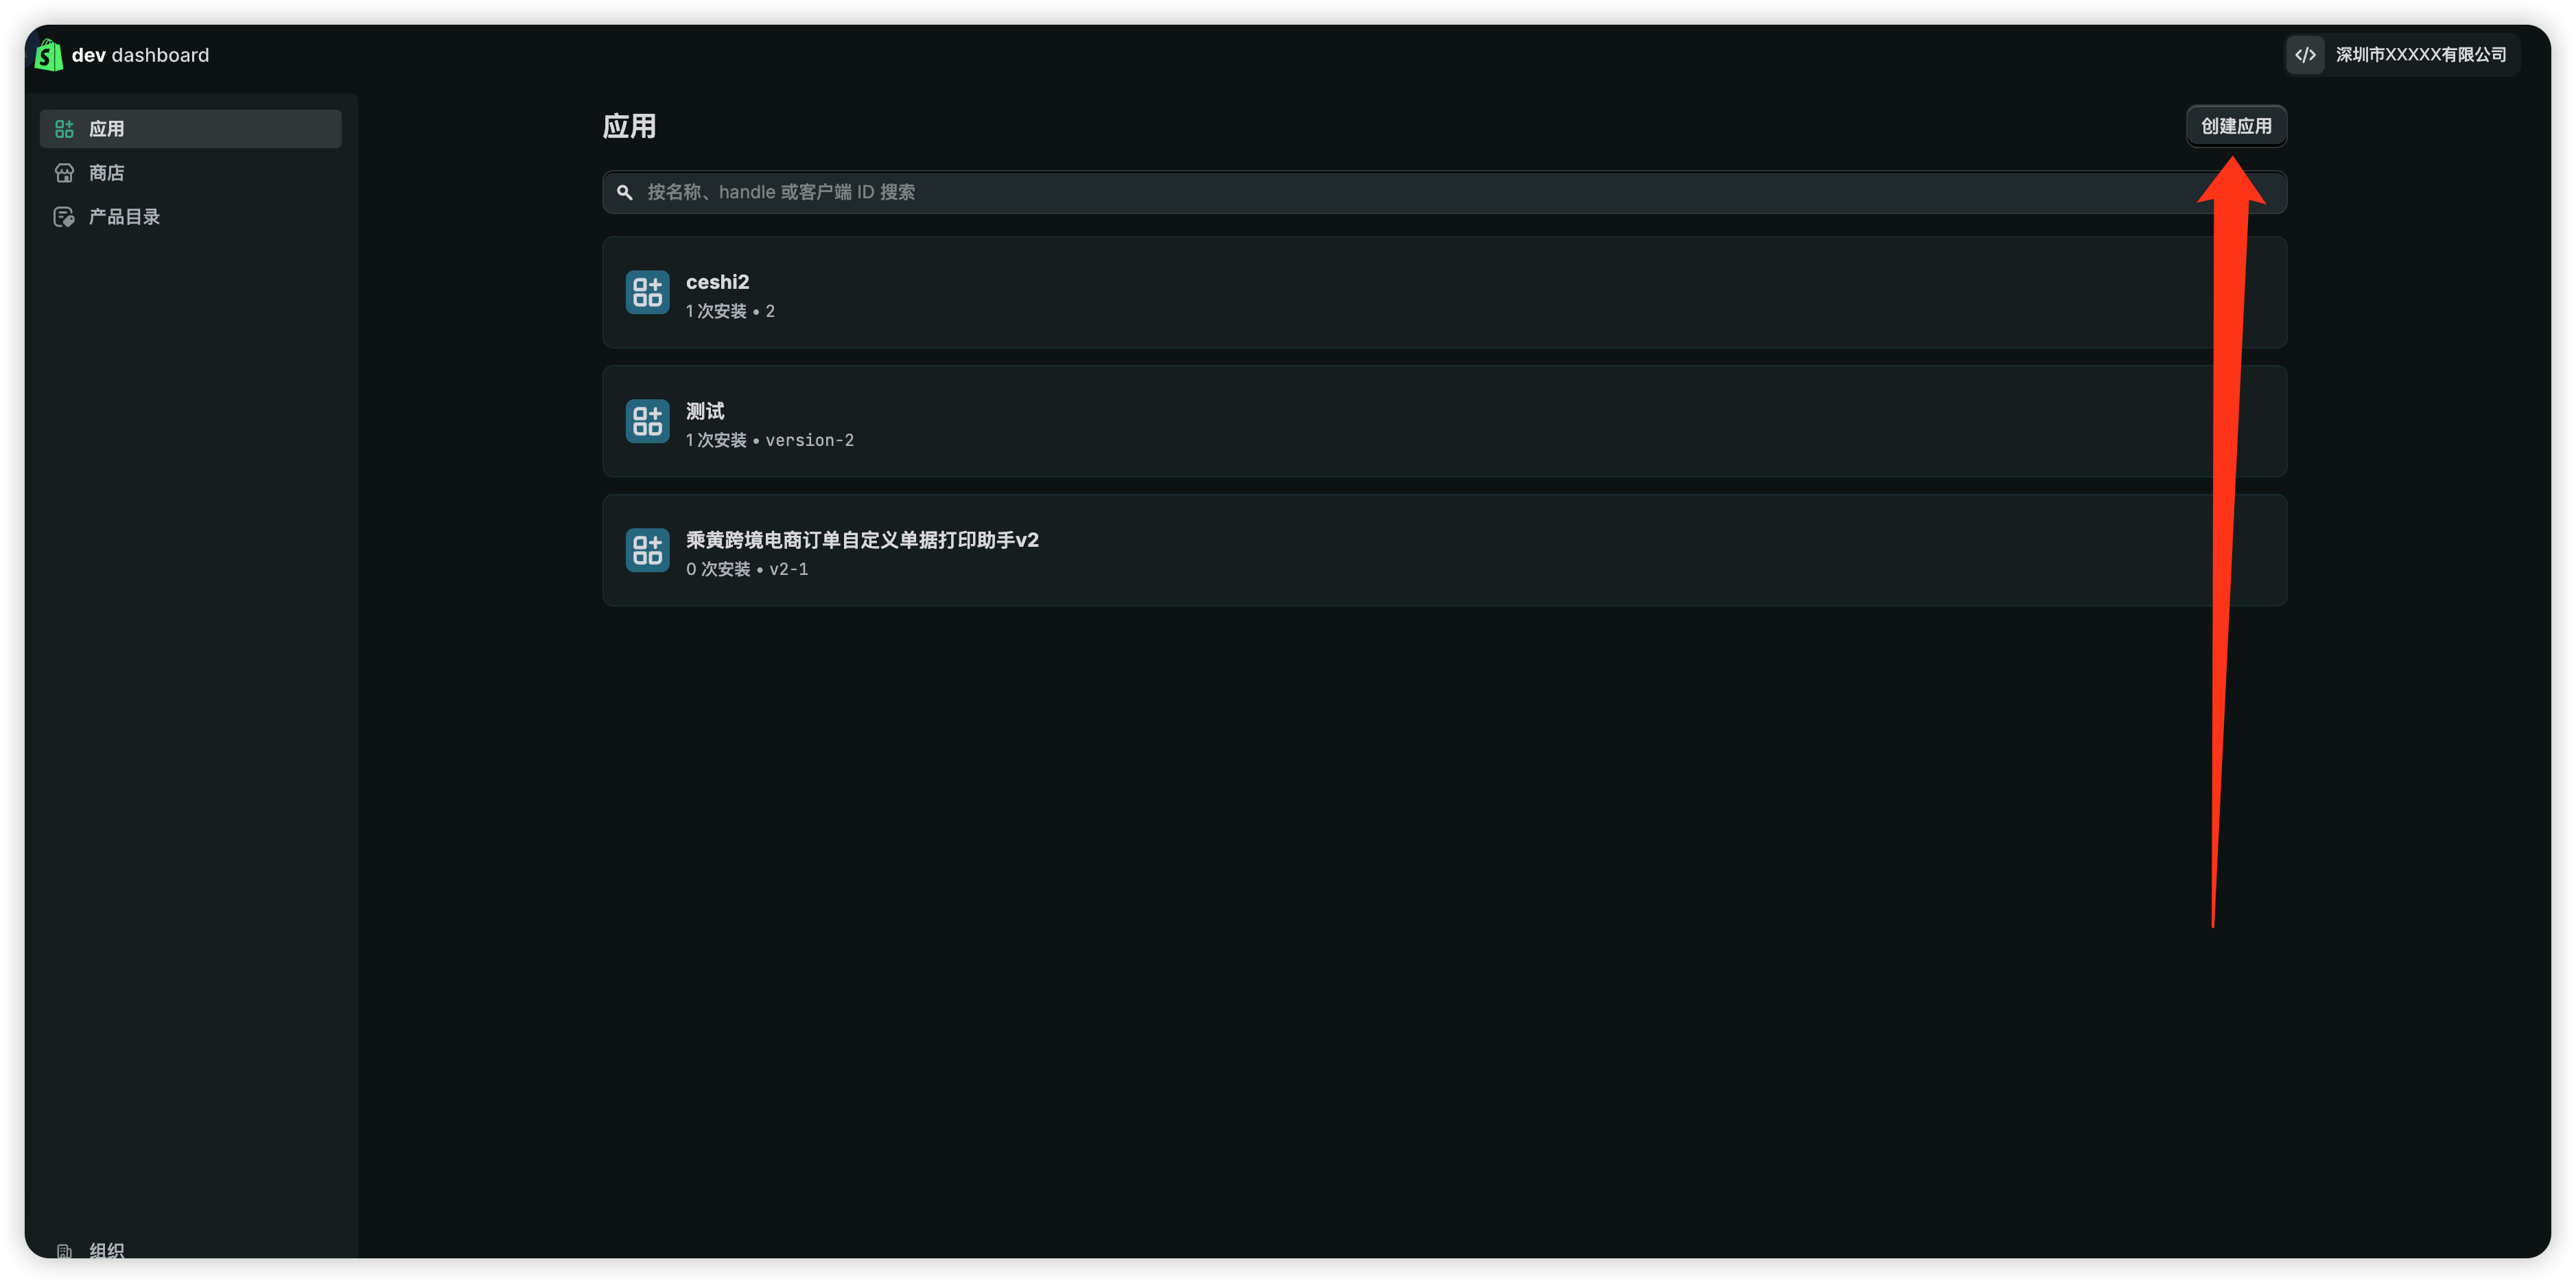
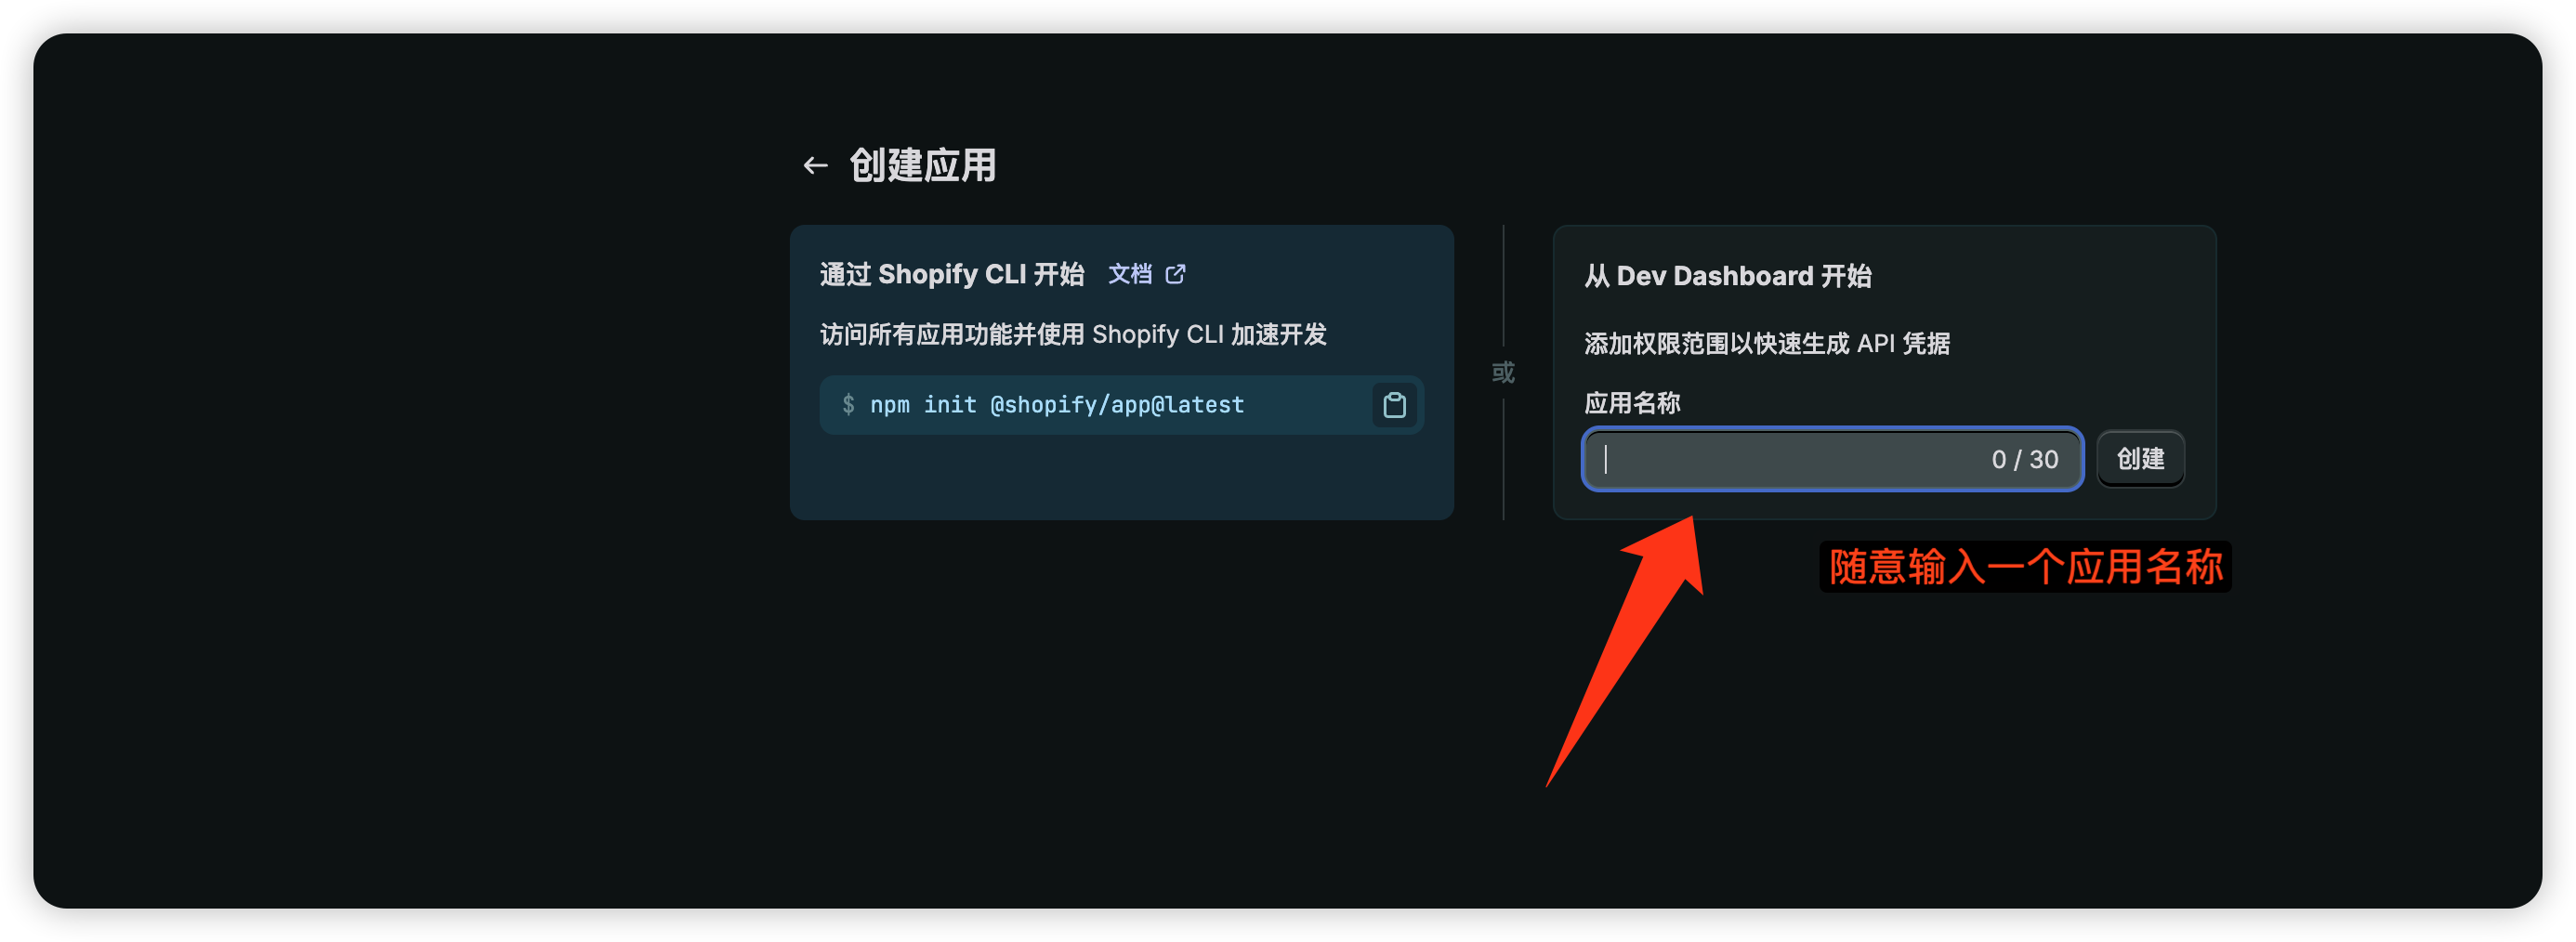
- Click Create app at the top right, enter any app name, and click Create;
- Set App URL to
https://chdd.fun; - Uncheck Embed app in Shopify admin;
- Set Webhook API version to 2025-07;
- Under Access scopes, select all order-related permissions (or simply select all if you prefer);
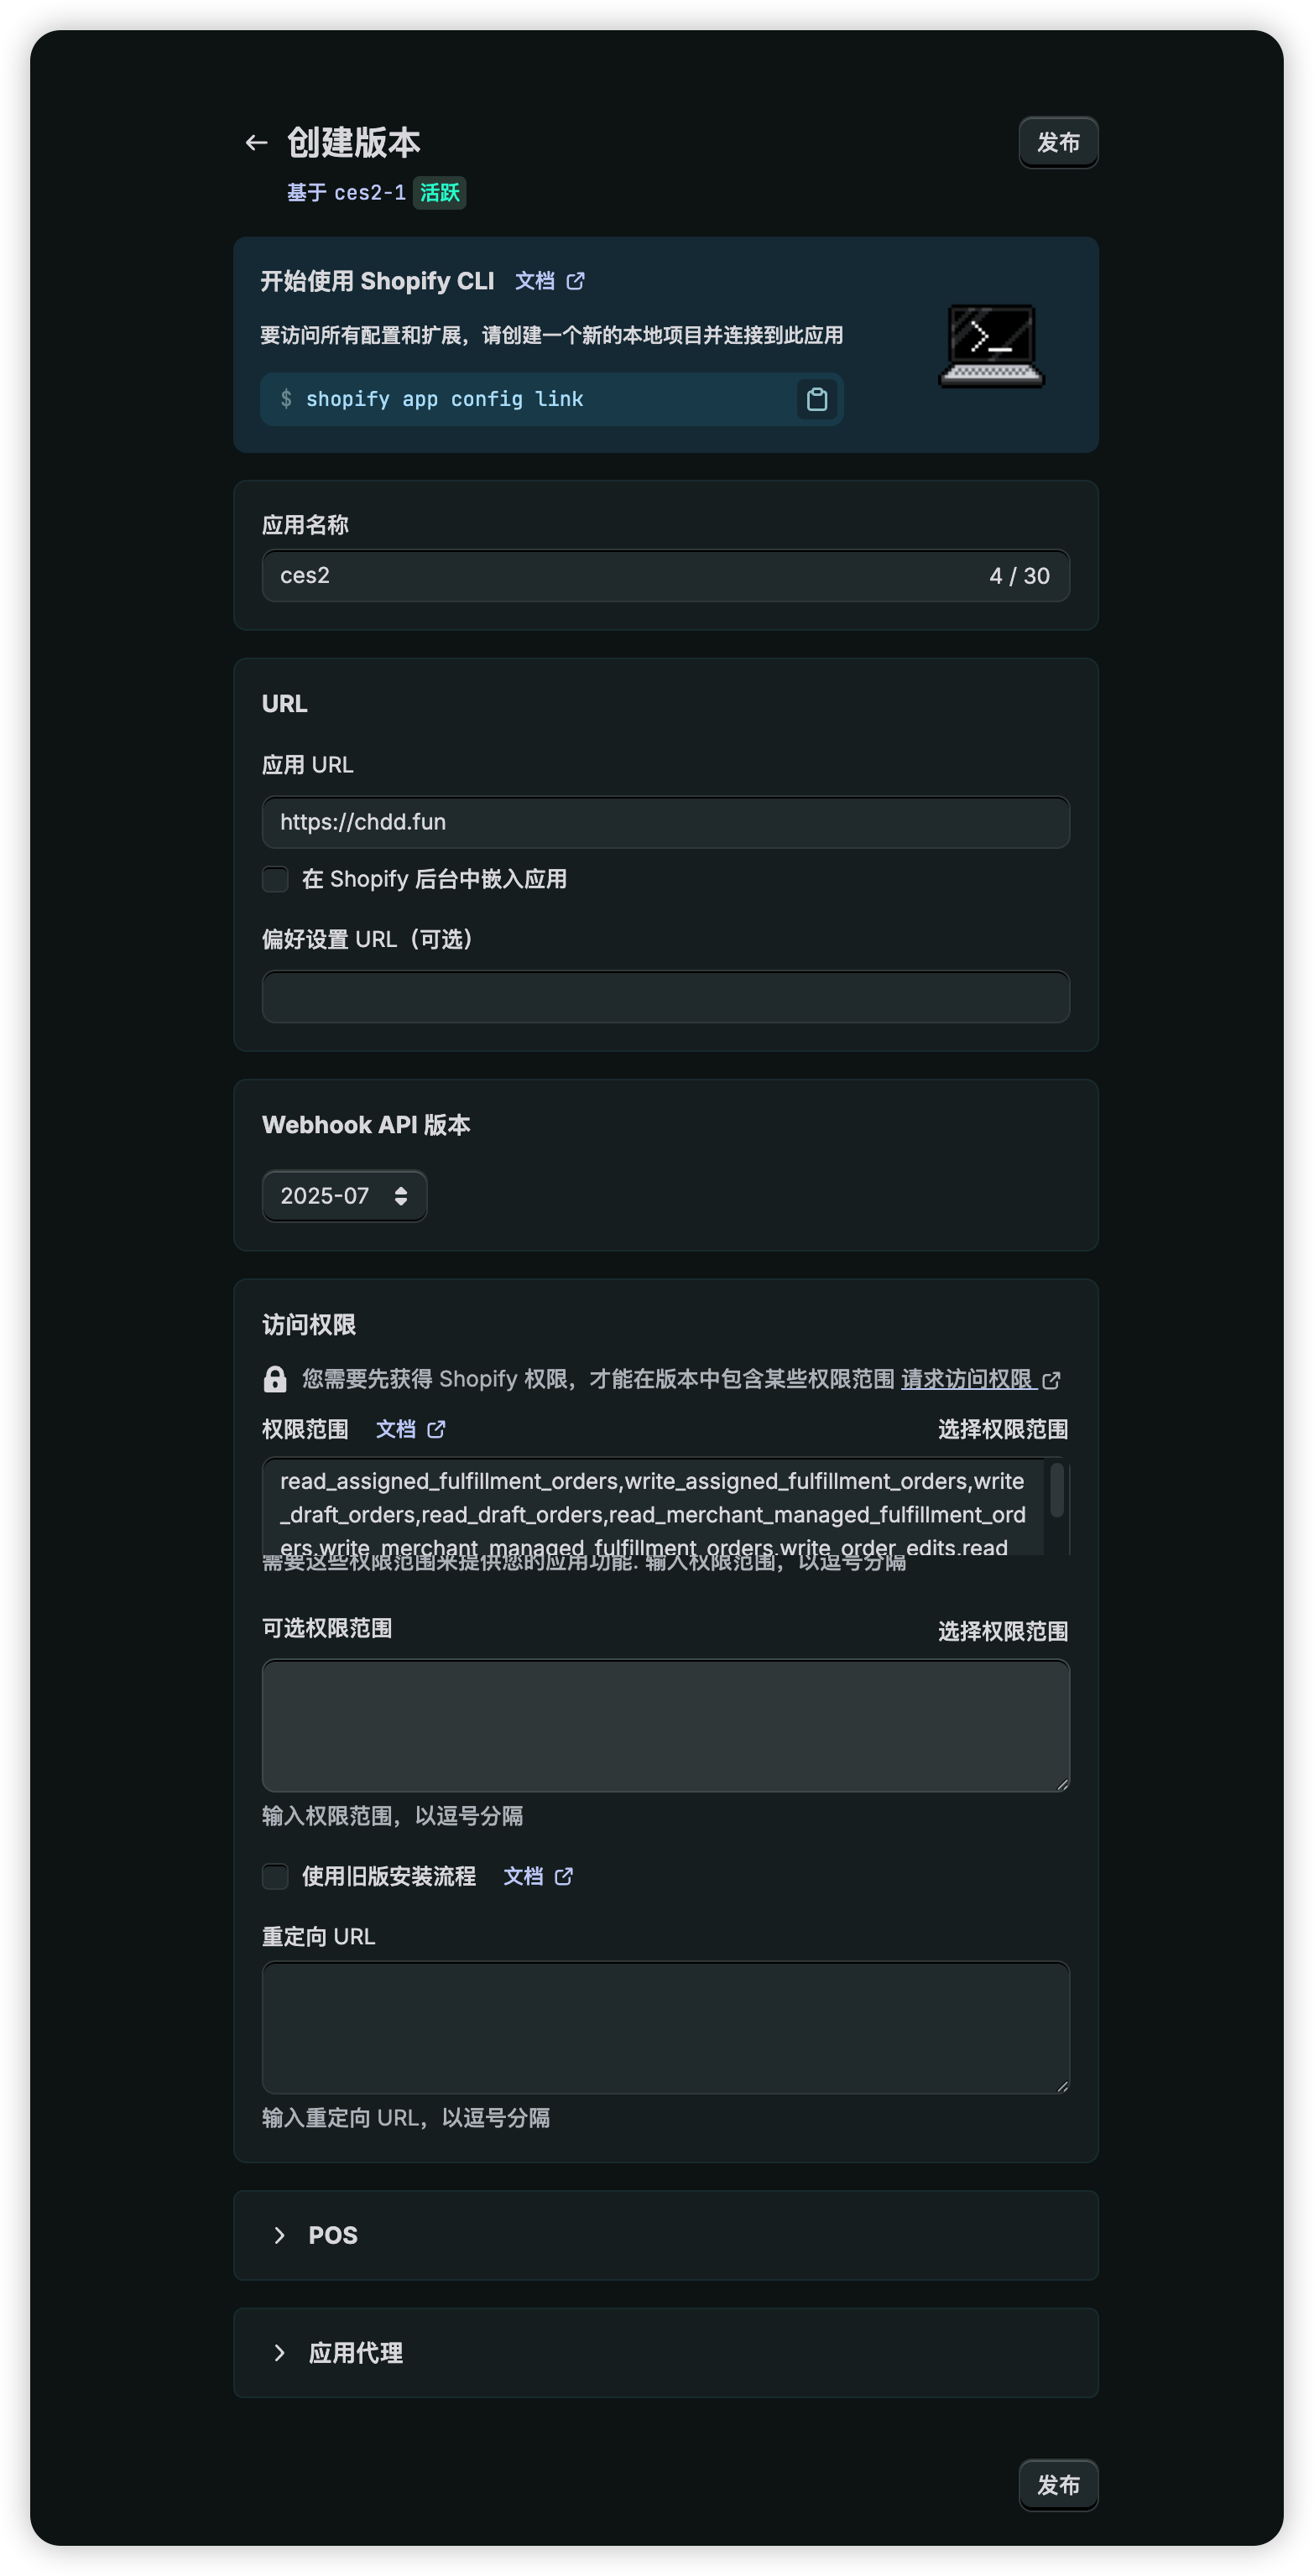
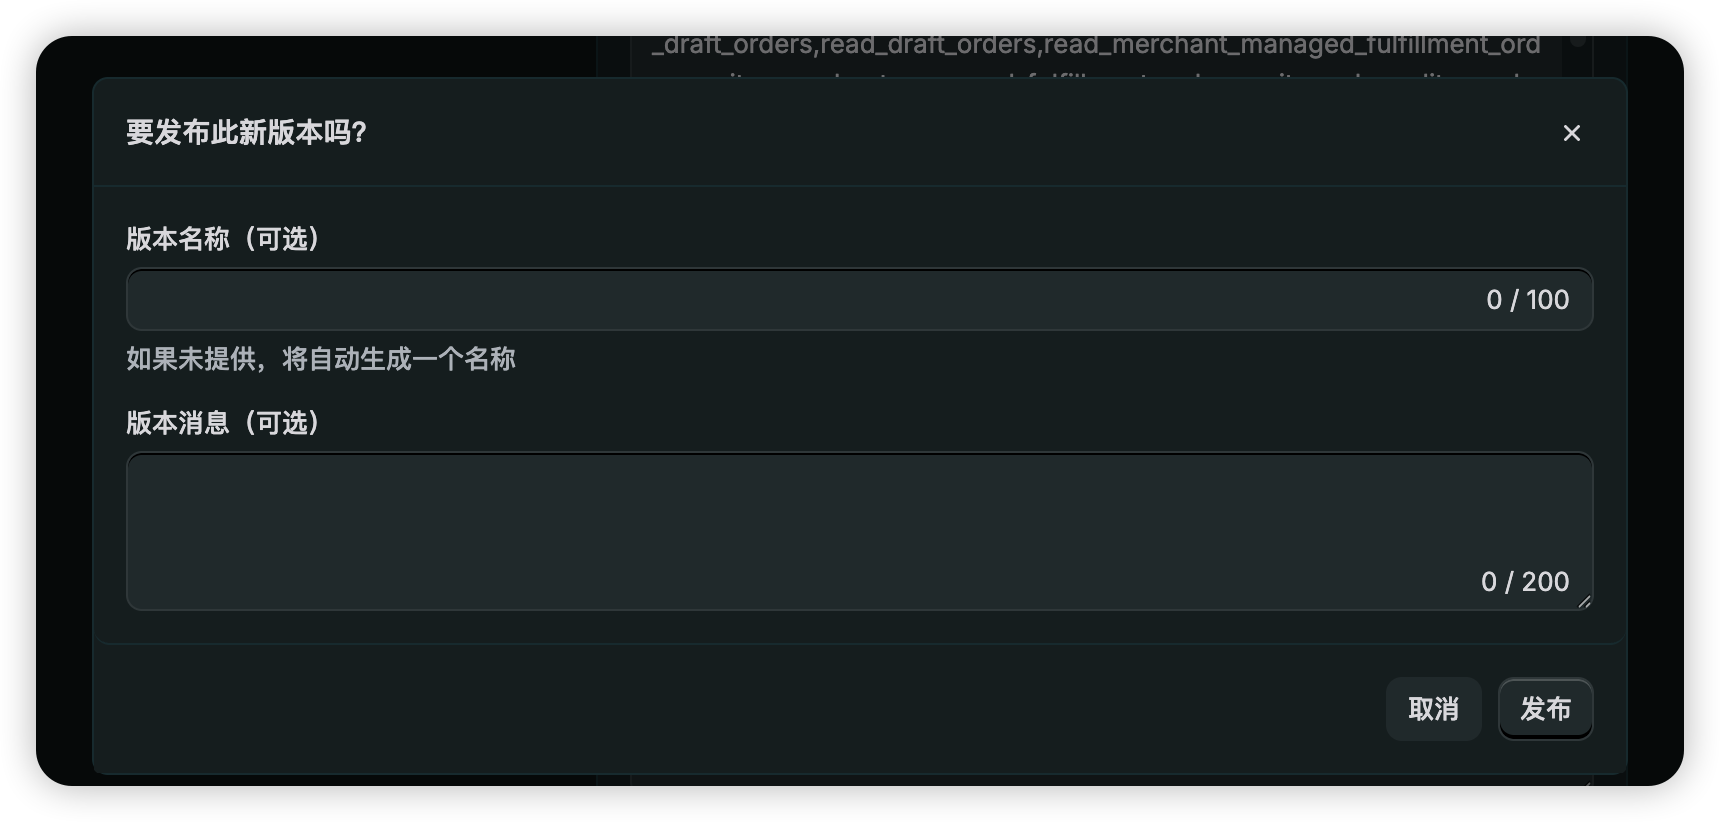
- Click Release (the release name is optional);
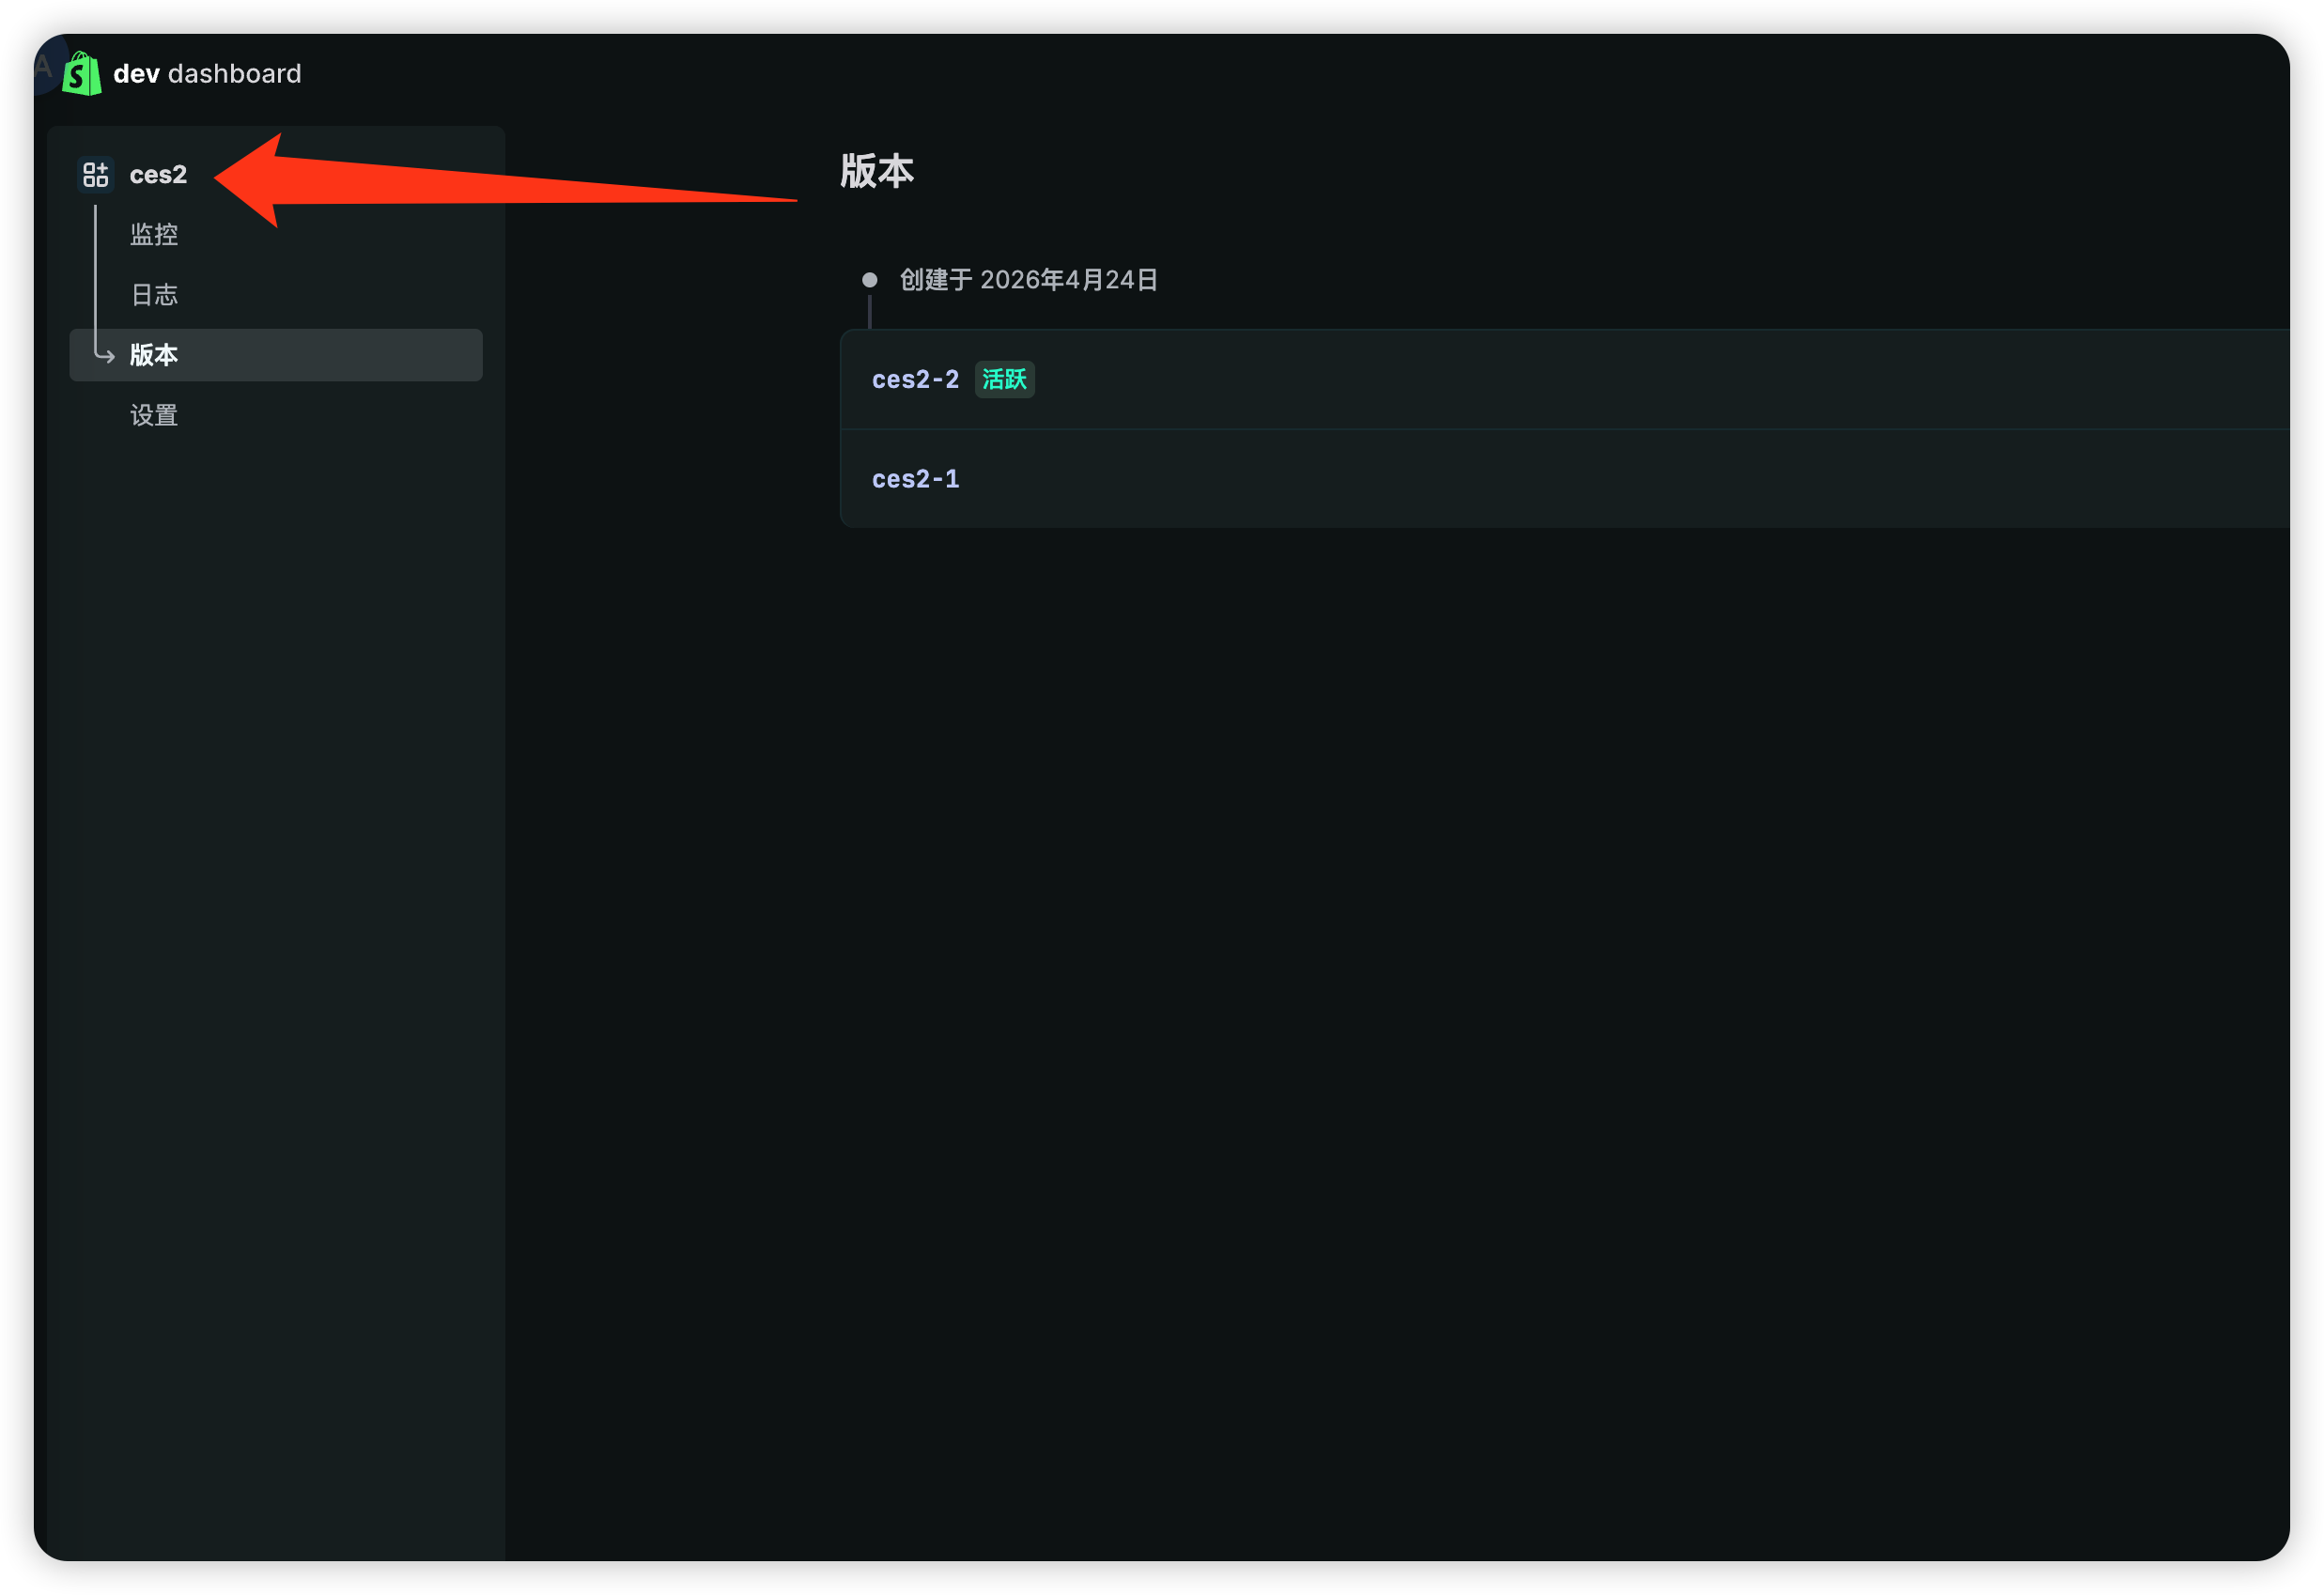
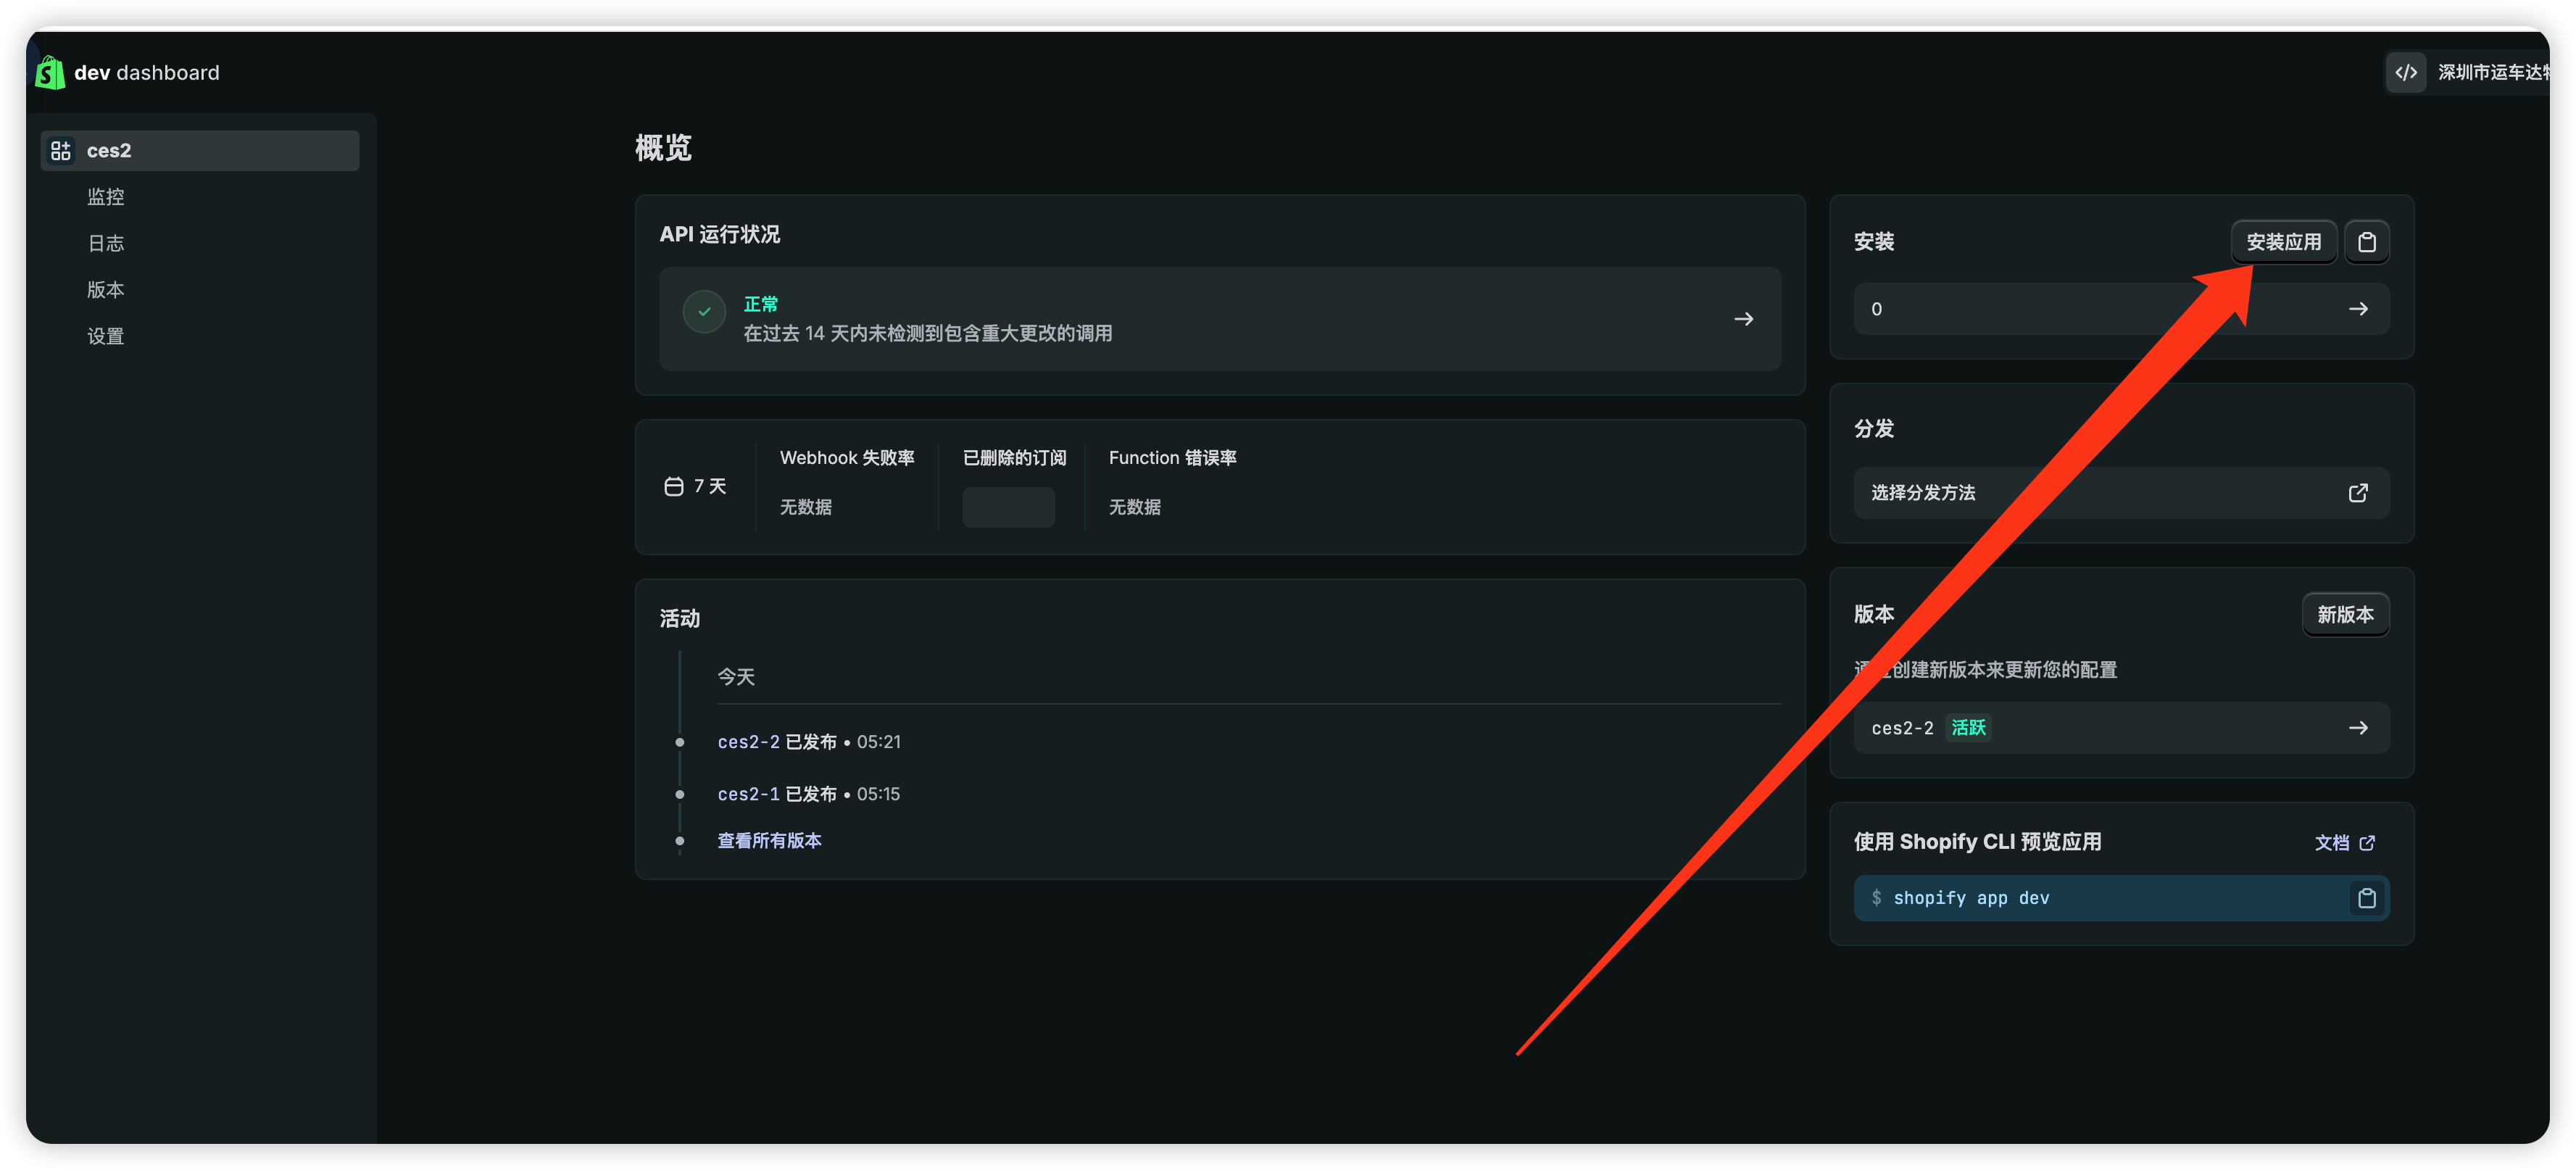
- After releasing, click your app's name in the left menu, then click Install app on the right and follow the flow (all inside the Shopify admin);
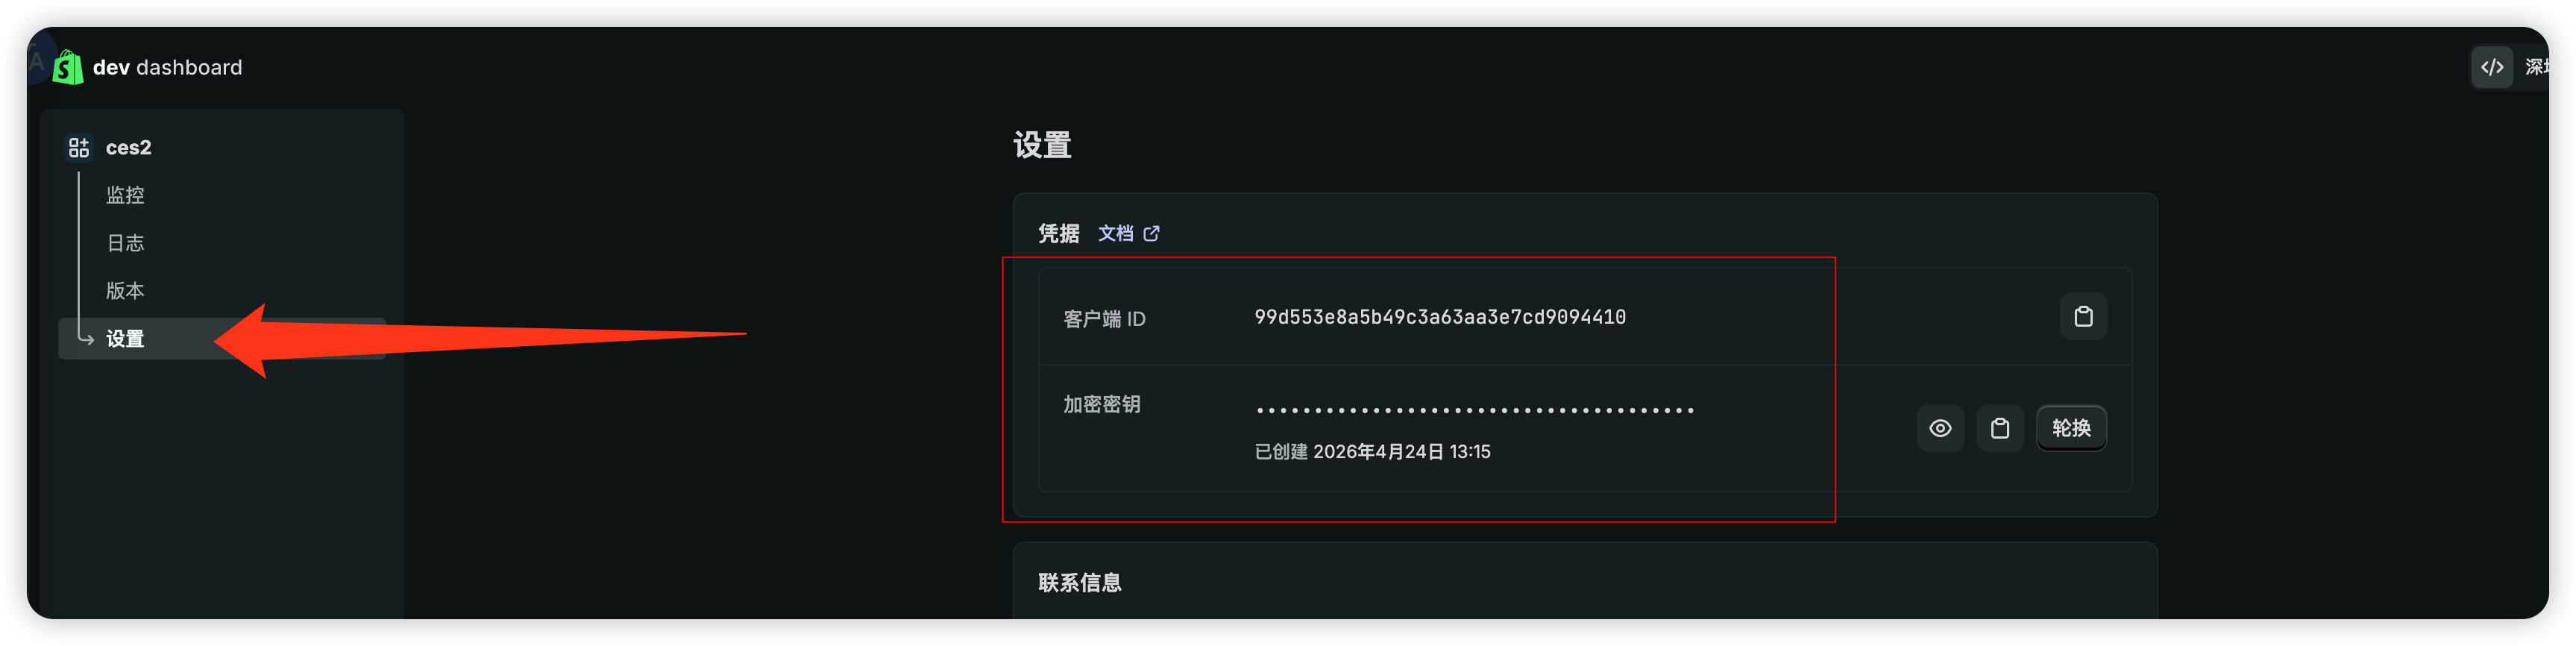
- Once installed, open Settings on the left of the app development page — the Client ID and Secret key shown there are your Client Id and Client Secret.
4. Fill in and verify
- Back in CH Order Print, fill in Store ID, Store Name, API URL, Client Id and Client Secret (Access Token can be left empty), then save;
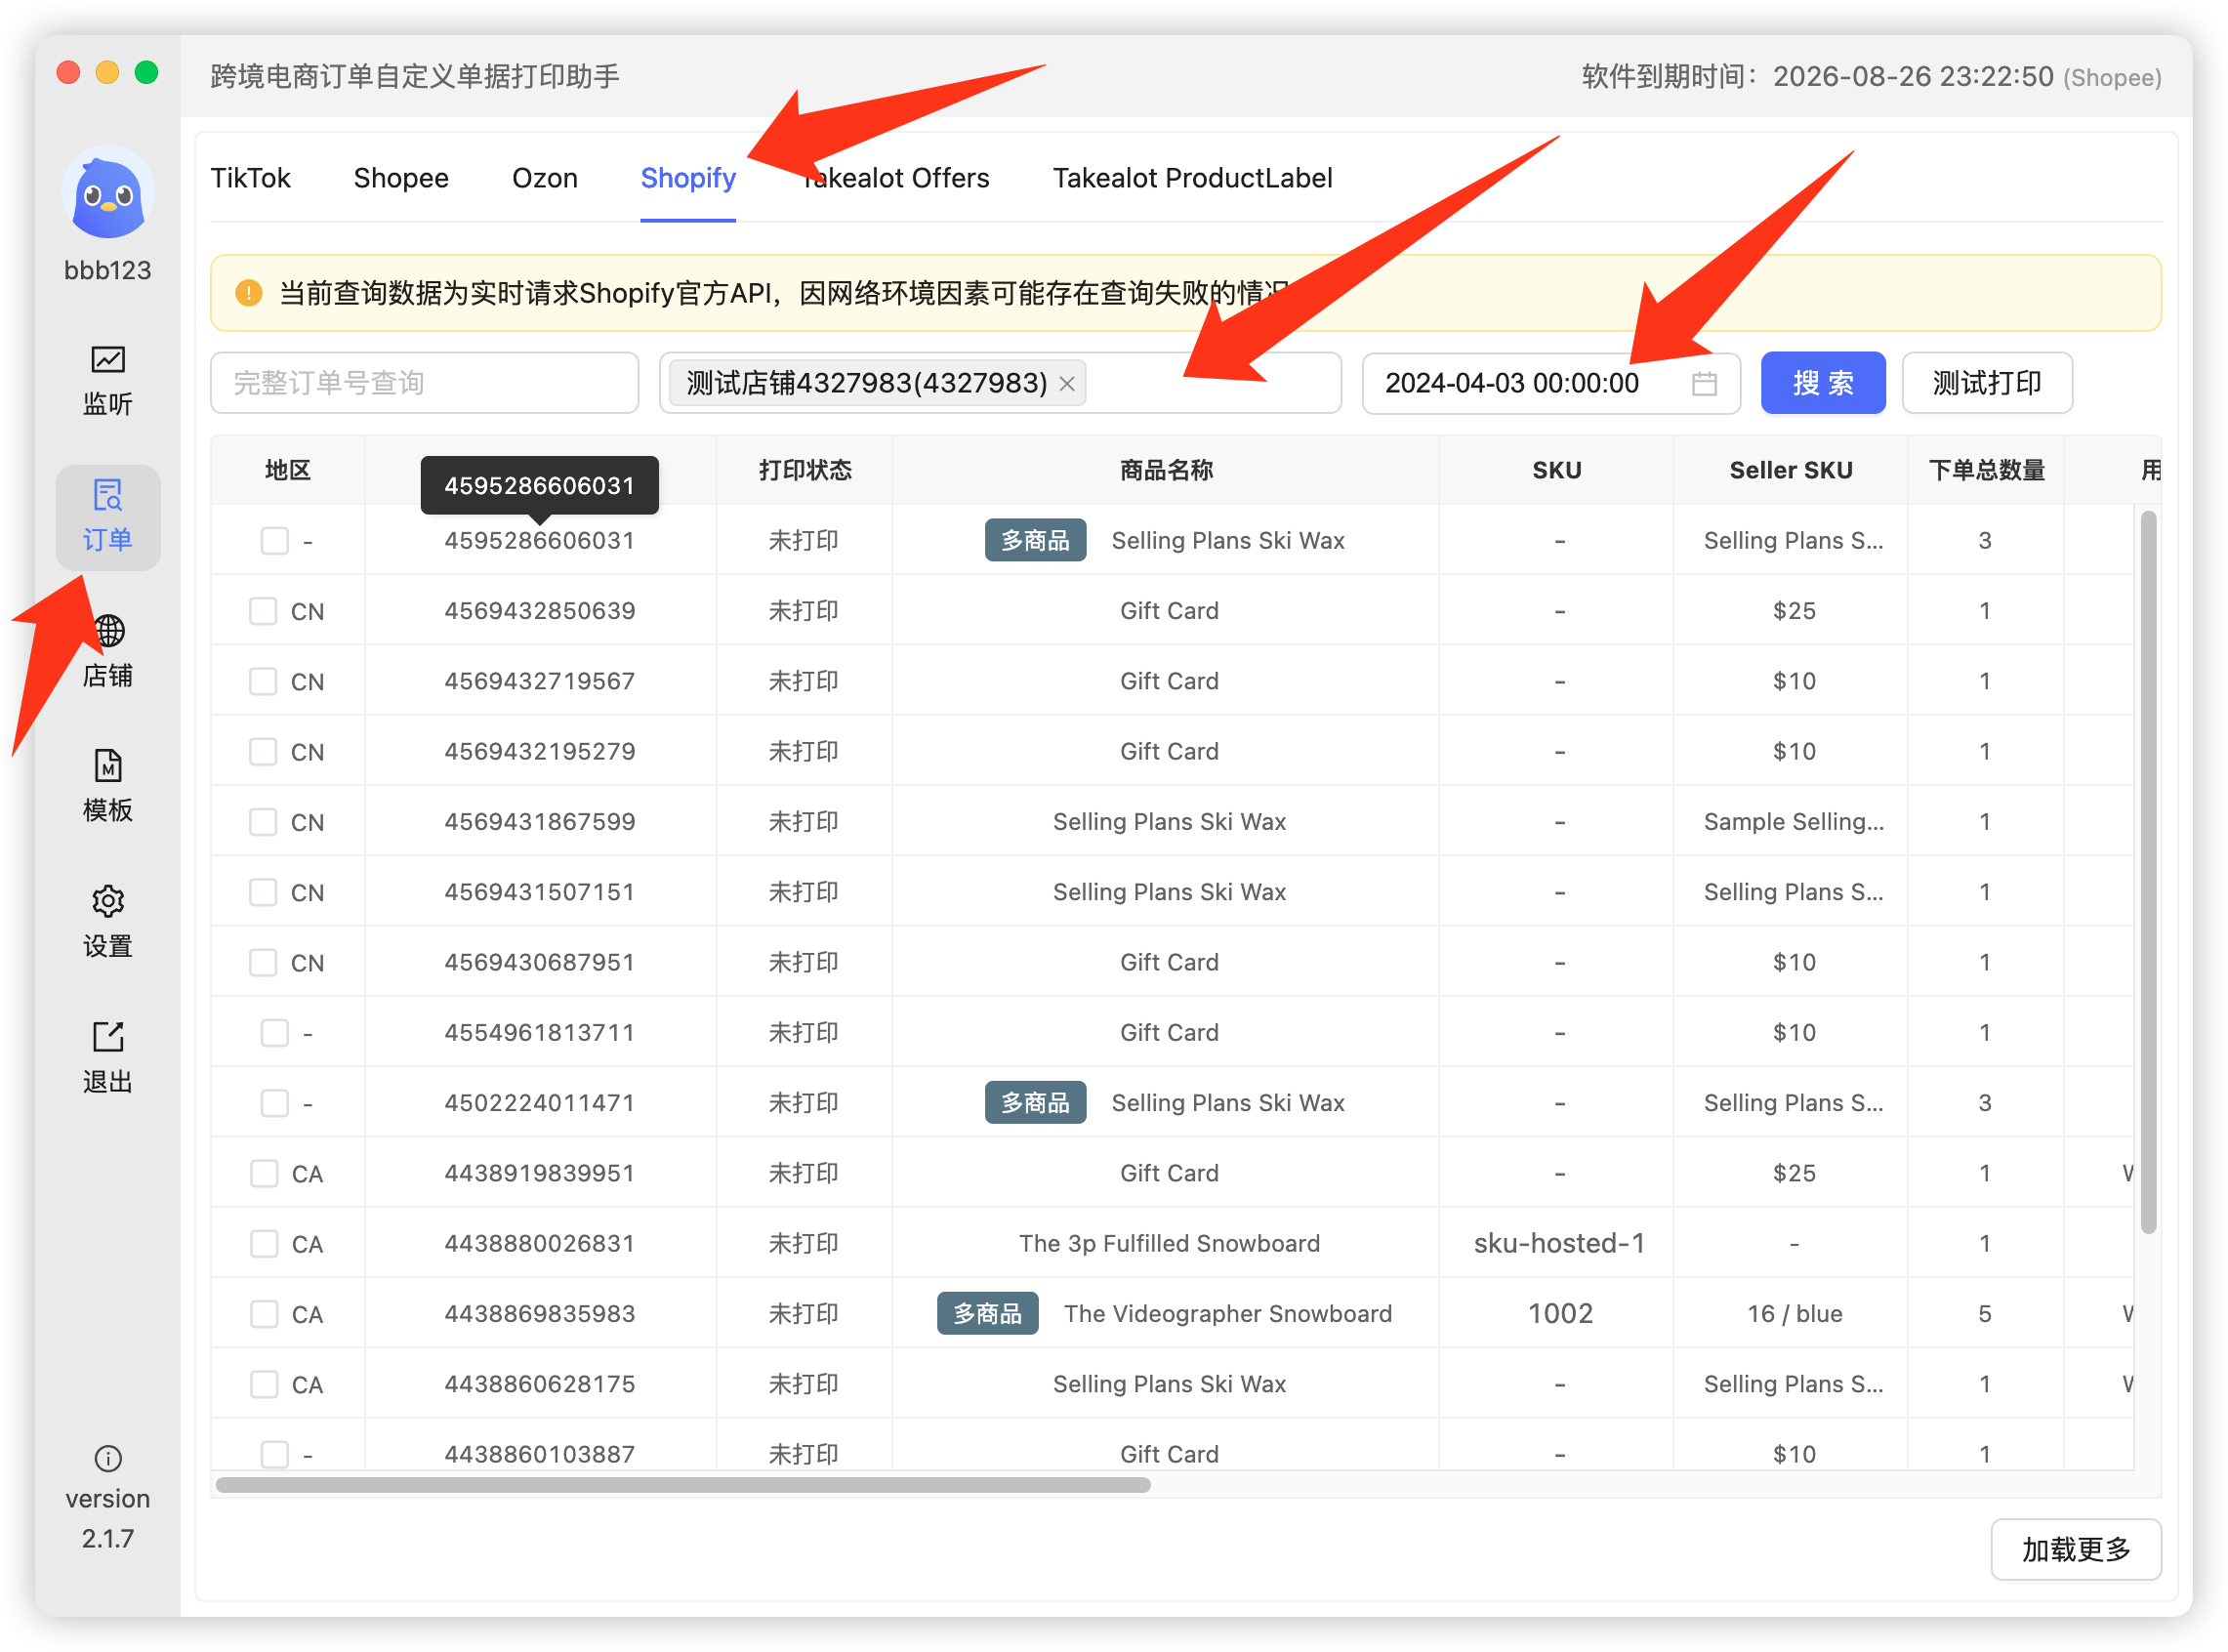
- Click Orders on the left, choose Shopify, select the store and a time range (the start time must be earlier than the order time), then search;
- If orders show up, the store info is correct and the Shopify authorization is complete.
 Or email us: